Deep Water Culture (DWC) is one of the most reliable and forgiving hydroponic systems for home growers. Instead of relying on timers, drip emitters, or sloped channels, DWC suspends plant roots directly in a well-aerated reservoir of nutrient solution. Because roots sit in a large volume of water that is continuously oxygenated by an air pump and air stone, plants grow rapidly while giving you a wide safety buffer against daily temperature, pH, and nutrient swings.
Whether you want to build a single 5-gallon bucket for a compact tomato or pepper plant or a rectangular storage tote for six heads of lettuce and basil, this guide walks through how DWC works, how to size each component, where to set the water level, and how to maintain the reservoir from transplant to harvest.
How Deep Water Culture works
In soil, roots find oxygen in the tiny pore spaces between soil particles. When soil stays waterlogged, those pores fill with stagnant water and roots suffocate. Deep Water Culture solves this by actively dissolving oxygen into the nutrient reservoir 24 hours a day.
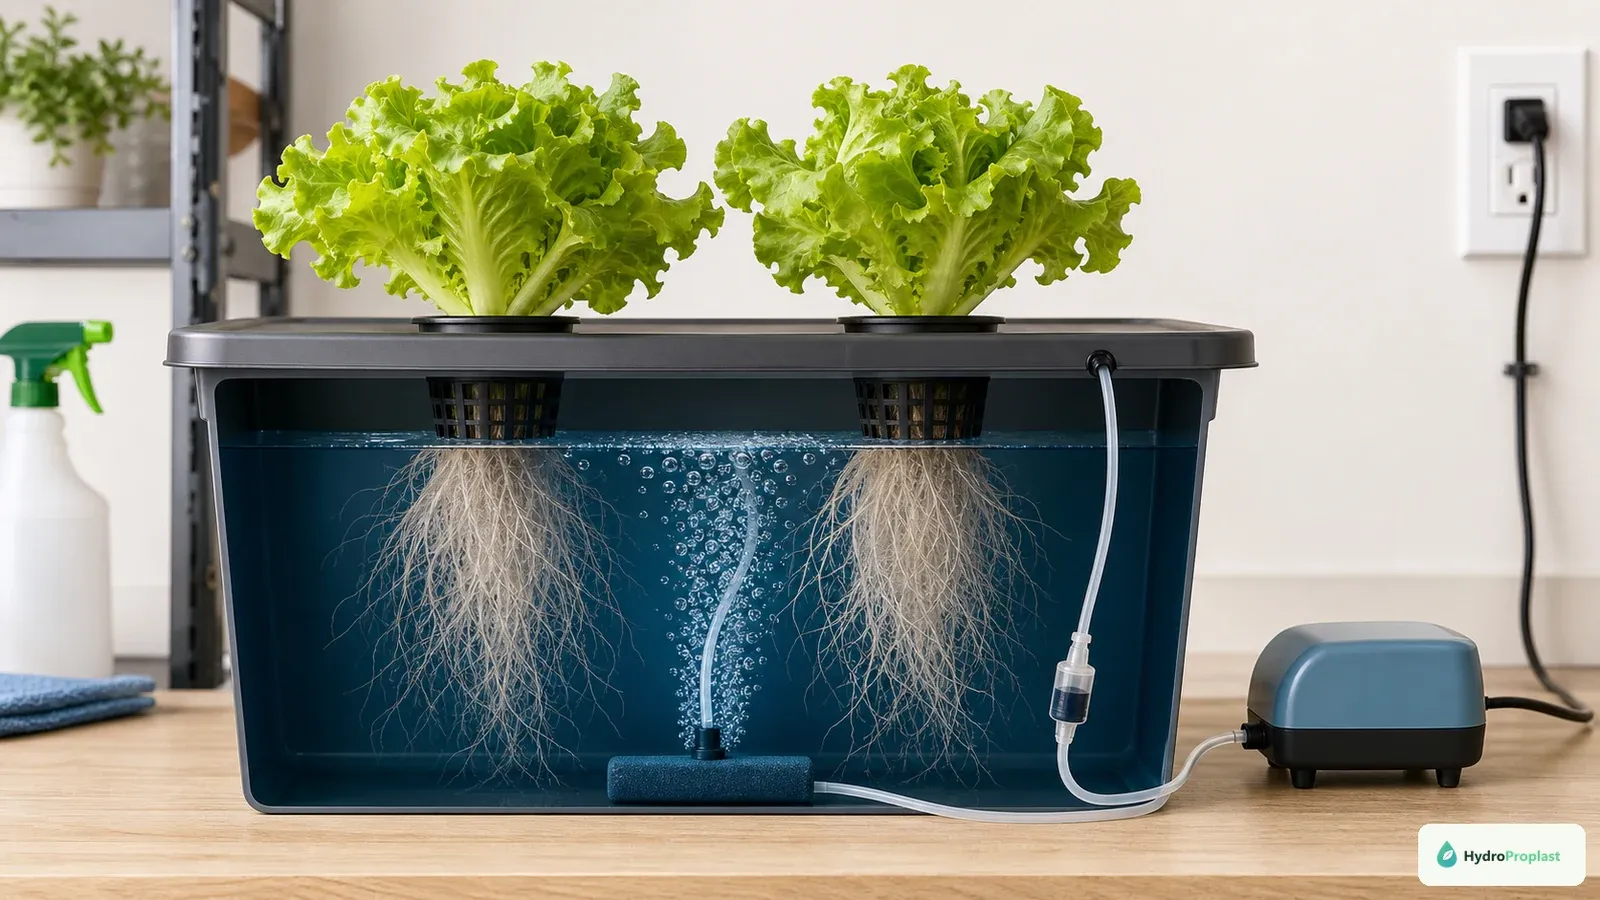 A reliable DWC setup suspends the net pot in a rigid lightproof lid while an external air pump and air stone keep the nutrient reservoir continuously oxygenated.
A complete DWC unit has five core parts:
- An opaque, food-safe reservoir: A 5-gallon (19 L) bucket for a single larger plant or a 10-to-17-gallon (38–64 L) heavy-duty storage tote for multiple leafy greens or herbs.
- A rigid, light-blocking lid: Holds one or more net pots securely without sagging when plants gain weight.
- Slotted net pots and inert grow media: Usually 2-inch or 3-inch net pots filled with rinsed expanded clay pebbles (LECA) surrounding a starter plug.
- An external diaphragm air pump: Pushes room air through 4 mm airline tubing into the reservoir.
- One or more air stones (diffusers): Break the air stream into fine bubbles that circulate the solution and maintain dissolved oxygen around the roots.
Single bucket vs. multi-plant tote: which should you build?
Before cutting holes in a lid, match the reservoir geometry to the crop you plan to grow:
- Multi-site DWC tote (10–17 gallons / 38–64 L): Ideal for lettuce, bok choy, spinach, kale, and indoor herbs. A shallow, wide tote lets you space 4 to 6 plants 6–8 inches (15–20 cm) apart while sharing one stable body of water.
- Single-site DWC bucket (5 gallons / 19 L): Best for a single basil bush, compact pepper, cucumber, or dwarf indoor tomato. Giving a heavy-feeding plant its own reservoir prevents tangled root mats and lets you tailor EC to that plant’s fruiting stage.
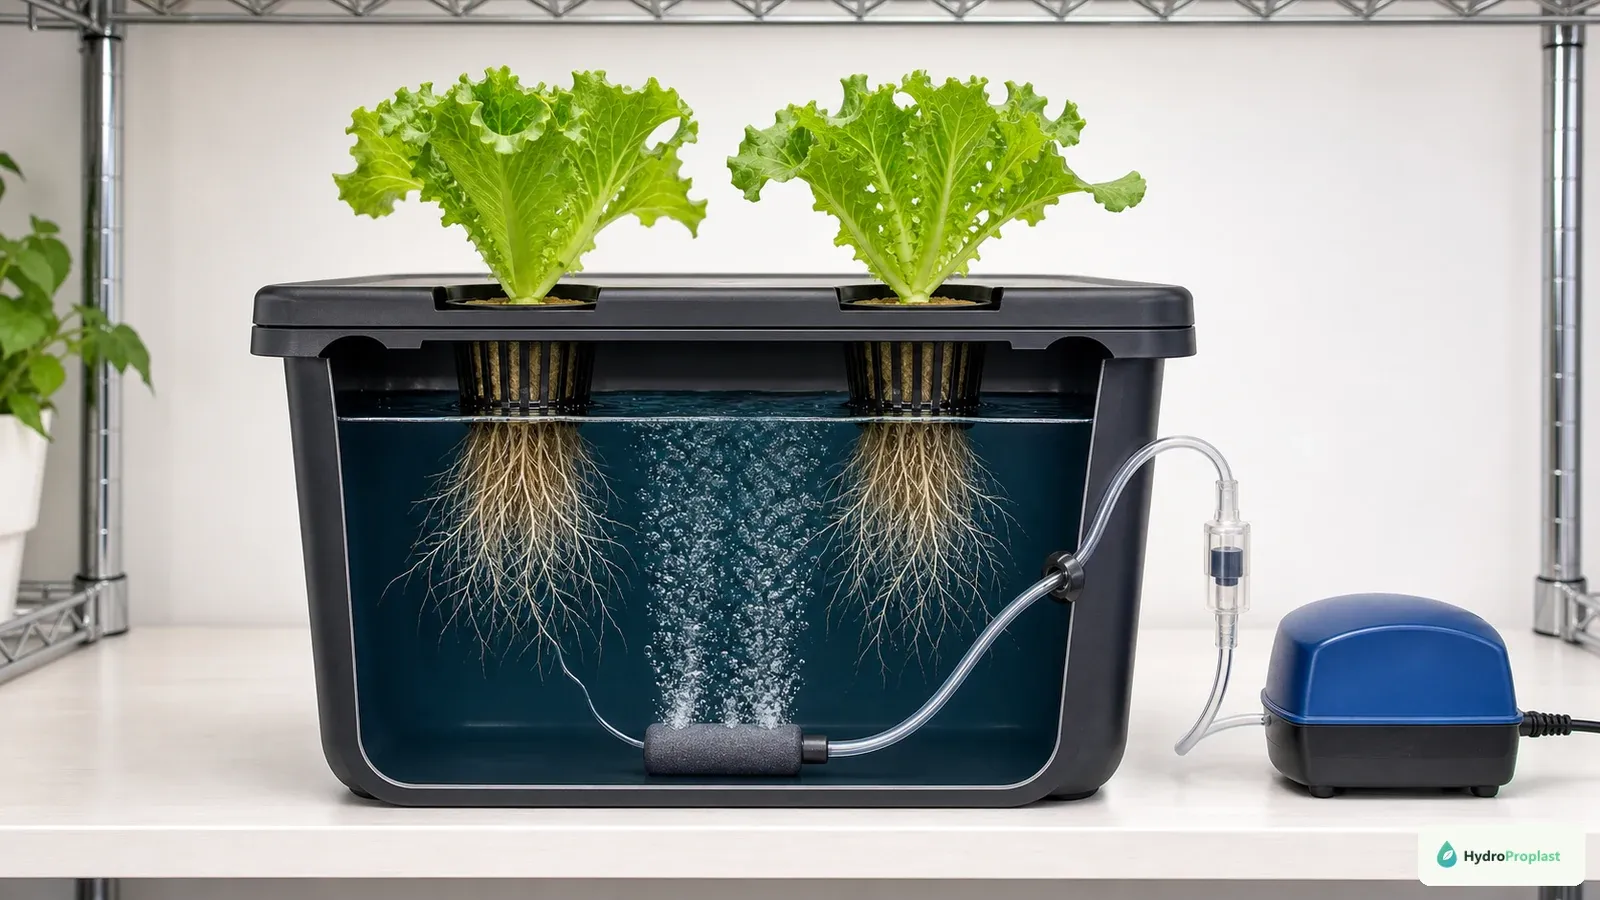 A wide storage tote with 4 to 6 net pots gives leafy greens stable water volume and slower pH and EC swings than tiny jars.
Sizing your air pump and air stone
Under-aerating a reservoir is the most common beginner mistake in DWC. Bubbles do two jobs at once: they transfer oxygen across the water surface and they keep nutrient solution moving past root surfaces so stagnant pockets cannot form.
- Target airflow: Aim for roughly 0.5 to 1.0 liter per minute (LPM) of airflow per gallon (3.8 L) of nutrient solution. For a standard 5-gallon bucket holding 3.5–4 gallons of working solution, a quiet 3–5 W air pump rated at 2.5–4 LPM with a medium cylinder or disc air stone is plenty.
- Use two air stones in rectangular totes: In a 12-gallon tote, placing one air stone at each end produces much more uniform circulation than a single stone in the middle.
- Protect the pump from back-siphoning: Always position the air pump above the top of the reservoir, or fit a simple one-way inline check valve in the airline tubing.
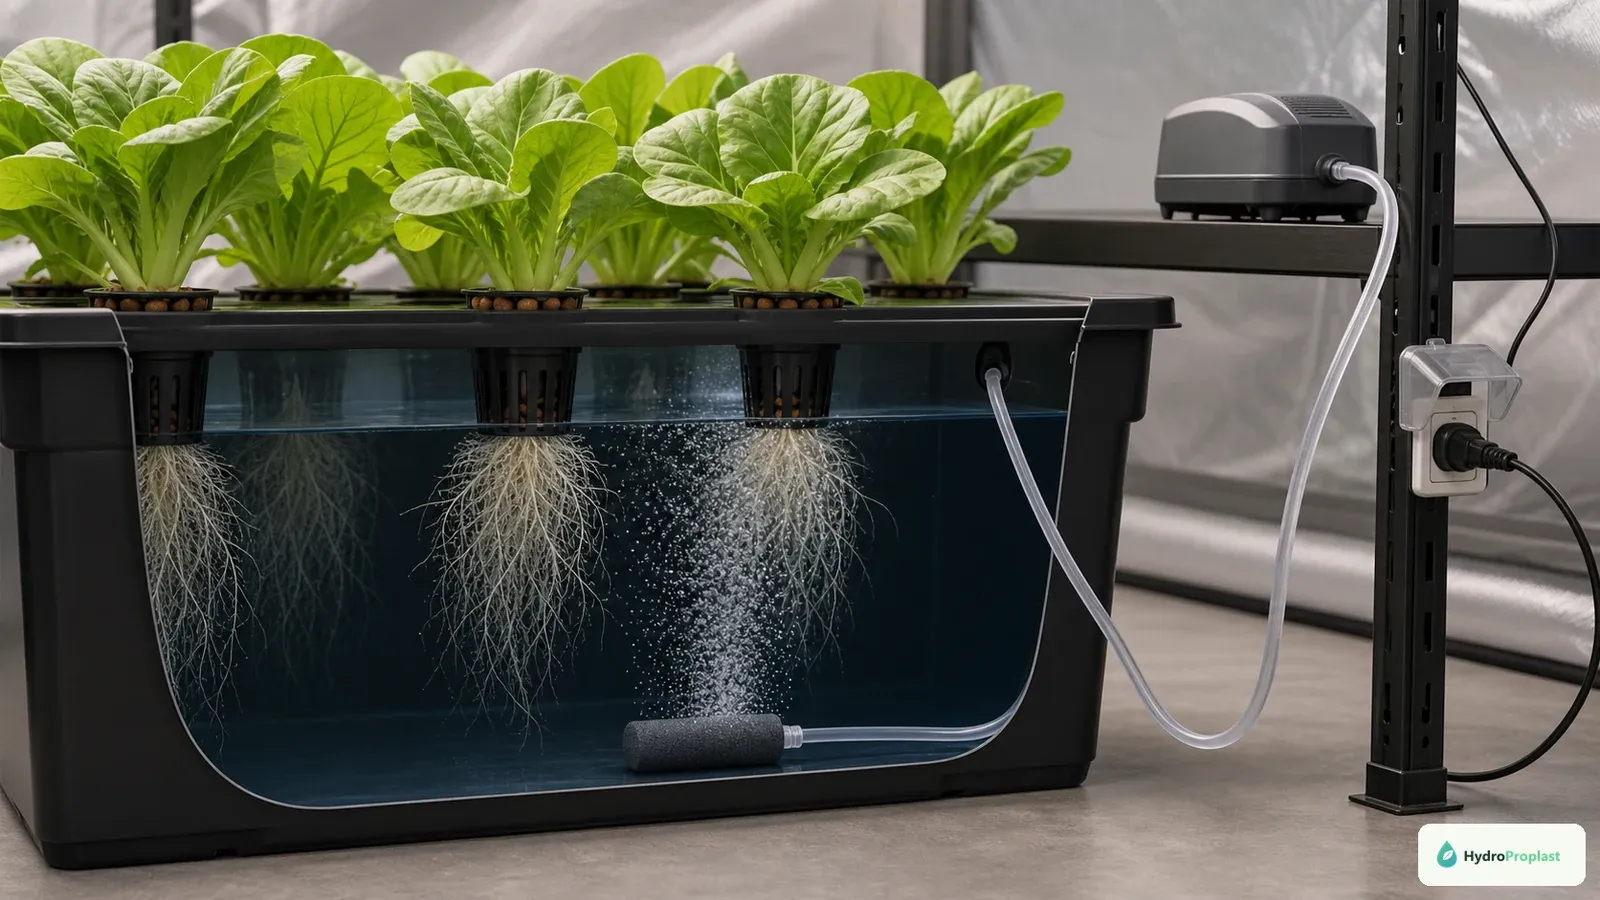 Place the air pump above the waterline or install a one-way check valve so water cannot siphon backward during a power interruption.
Where to set the water level at transplant and after roots emerge
Setting the waterline correctly prevents both dried-out transplants and waterlogged stems:
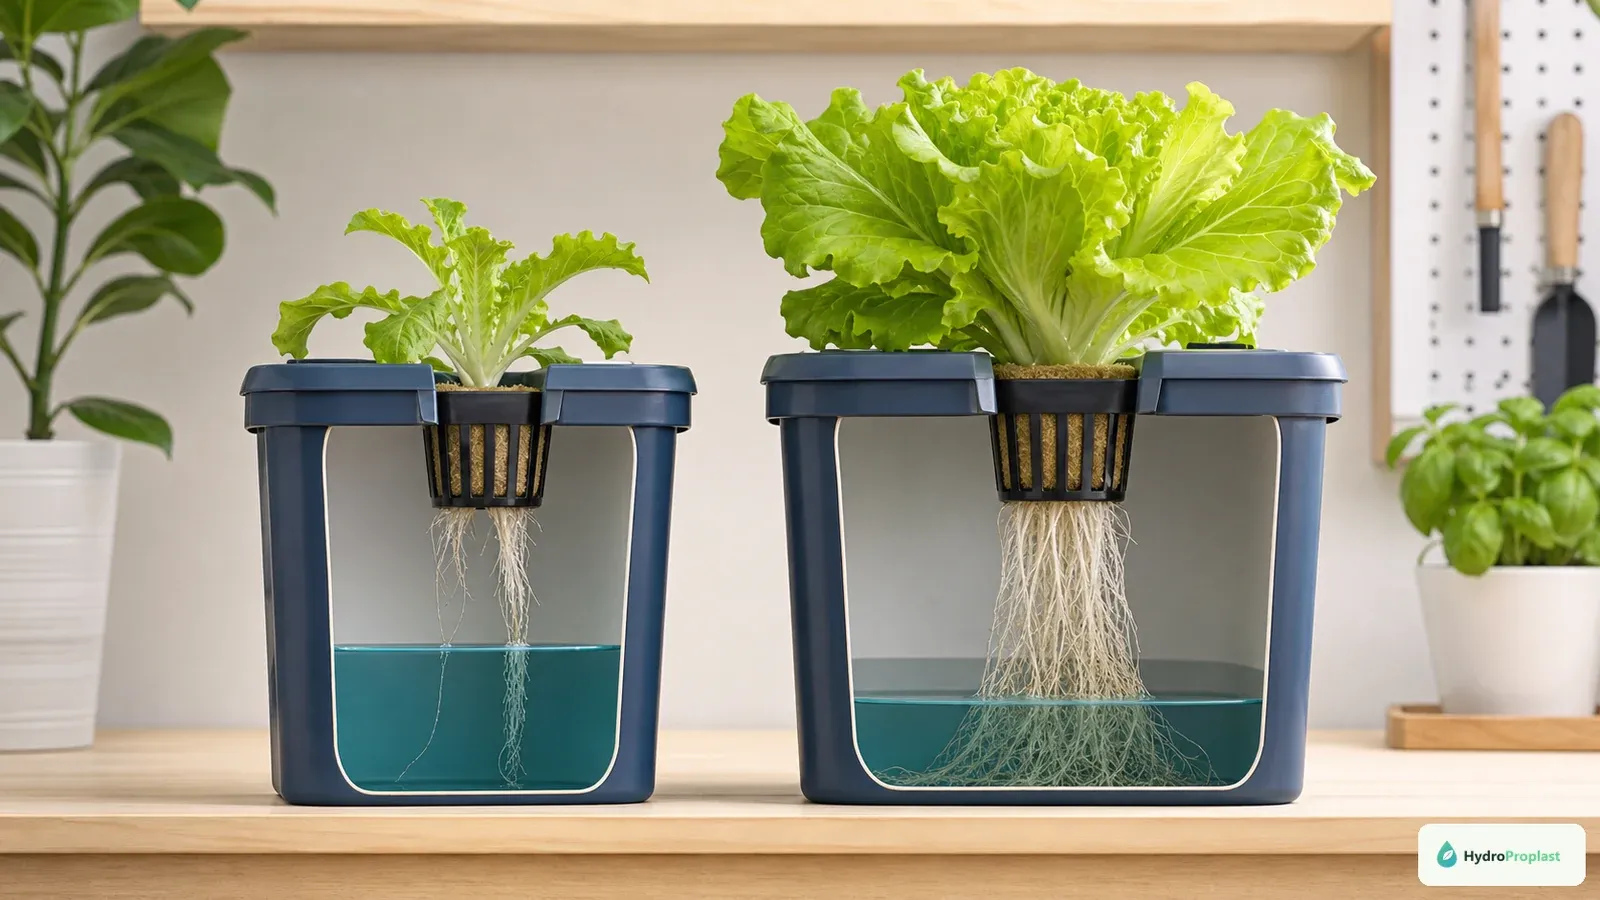
- First 3–7 days after transplanting: Fill the reservoir until the solution sits just at or 0.5 inch (1–1.5 cm) below the bottom of the net pot. Rising bubbles popping at the surface should mist the lower clay pebbles so moisture wicks gently into the bottom of the seedling plug without submerging the plant stem.
- Once white roots extend 2–3 inches below the net pot: Allow the water level to drop naturally until there is a 1-to-2-inch (2.5–5 cm) humid air space between the bottom of the net pot and the solution surface. That upper root zone stays moist while absorbing oxygen directly from the humid air pocket, and the lower root mass feeds in the aerated solution below.
Weekly DWC maintenance checklist
A properly sized DWC reservoir takes less than 15 minutes a week to maintain:
- Check water level every 2–3 days: Top up back to your working mark (keeping the 1–2 inch air gap below the net pot) following a measured reservoir top-up routine.
- Measure pH and EC: Keep hydroponic pH between 5.5 and 6.2 for most greens and herbs, and adjust EC to crop stage (typically 1.0–1.4 mS/cm for lettuce and 1.6–2.4 mS/cm for fruiting crops).
- Watch reservoir temperature: Cool water holds significantly more dissolved oxygen than warm water. Aim to keep the solution between 65°F and 72°F (18–22°C) using our water temperature guide.
- Inspect roots and bubble vigor: Healthy DWC roots look cream-to-white with fine lateral branching. If bubbles weaken, check for kinked tubing or mineral-clogged air stones.
- Replace the nutrient solution every 10–14 days: Drain, rinse, and refill with fresh nutrient solution on a regular water-change schedule, and clean and sanitize the bucket between crop cycles.