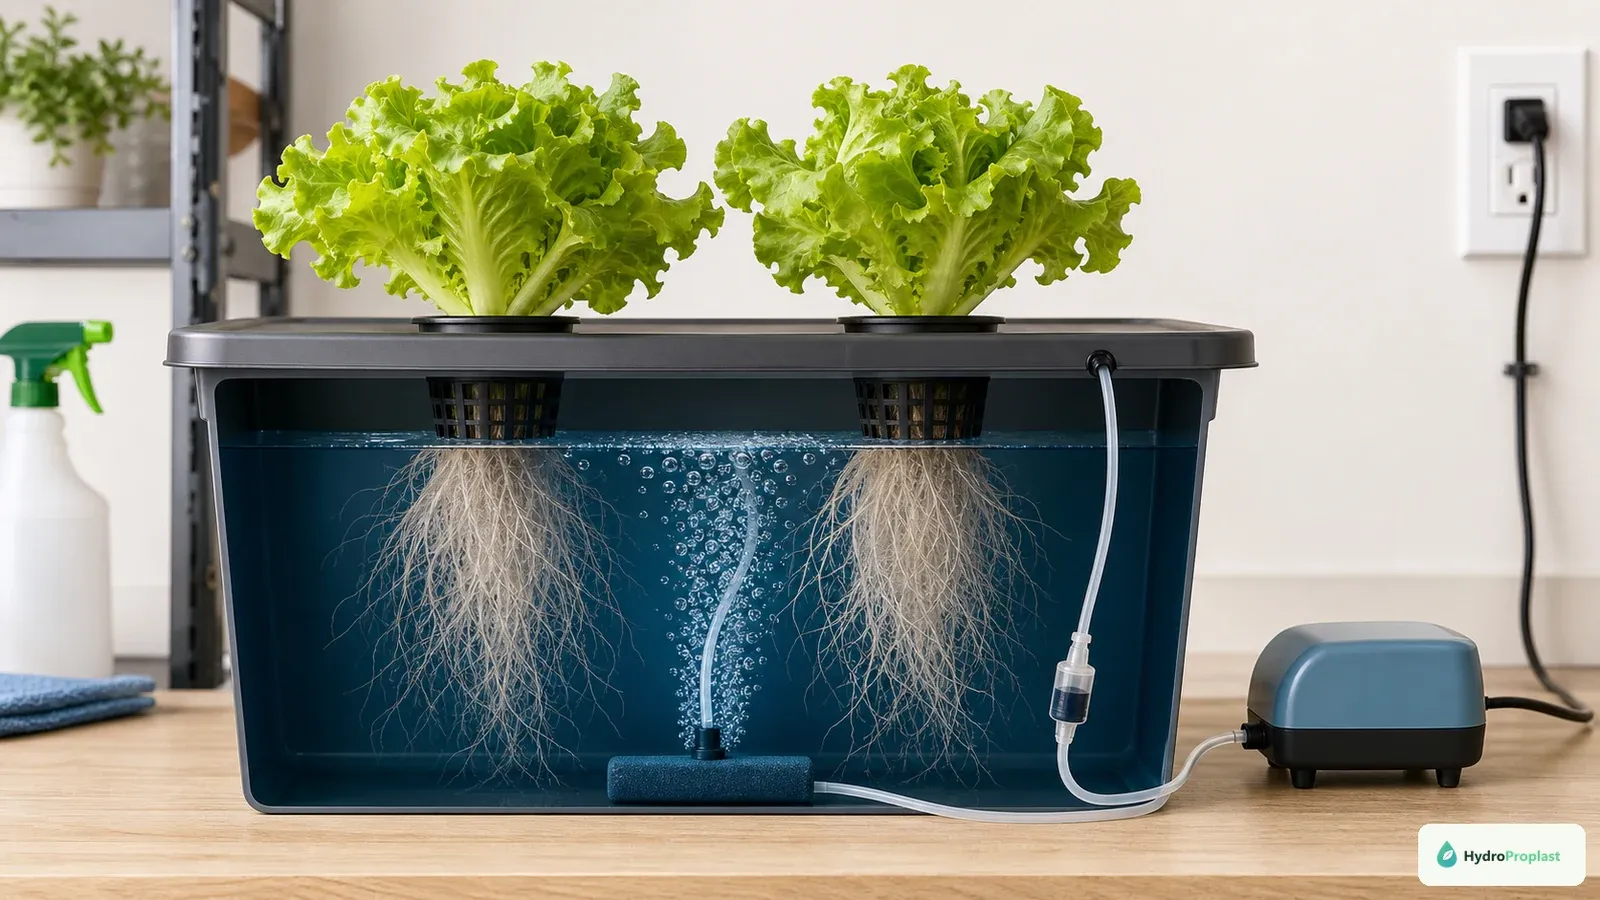
Developed by Dr. Bernard Kratky at the University of Hawaii, the Kratky method is the simplest non-circulating hydroponic technique in use today. It uses no air pump, no water pump, no timers, and no electricity. In its classic “set-and-forget” form, you fill an opaque container with nutrient solution once at transplant, place a seedling in a net pot lid, and harvest a full head of lettuce or bunch of herbs four to six weeks later without ever plugging anything into the wall.
Because there is no mechanical aeration, the Kratky method succeeds or fails on one physical principle: maintaining a humid air gap above the water surface. This guide explains how that air gap forms, how to size containers for different crops, and how to avoid the common refill mistake that kills passive hydroponic plants.
How the Kratky method oxygenates roots without a pump
When you submerge a plant’s entire root system in still water, the roots quickly consume the small amount of dissolved oxygen in the container and suffocate. The Kratky method prevents this by dividing the root system into two specialized zones as the plant grows:
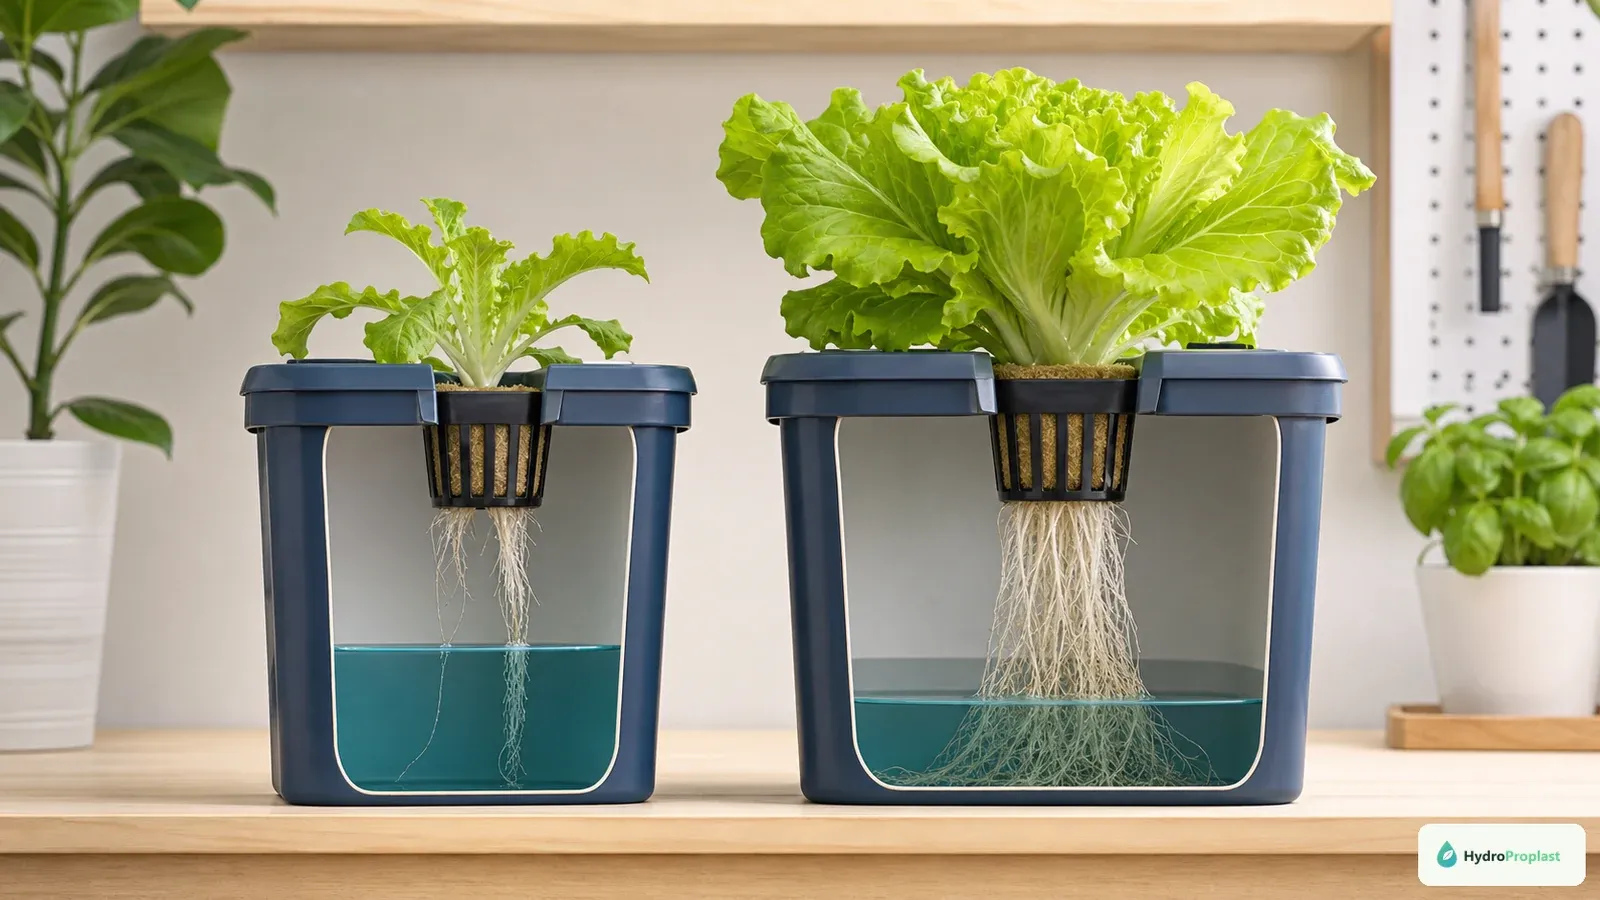 As the plant drinks nutrient solution, the dropping waterline creates a widening humid air zone that supplies oxygen to the upper roots without a pump.
- Stage 1 — Transplant and capillary contact: You fill the container so the nutrient solution barely touches the bottom 0.25 to 0.5 inch (0.5–1 cm) of the net pot. Capillary action through the clay pebbles and starter plug keeps the young roots moist while the seedling establishes.
- Stage 2 — Root elongation and air-gap formation: As the plant transpires water, the liquid level in the container drops. The lower root tips chase the falling waterline downward to absorb water and minerals, while the upper roots left suspended in the humid air space above the water develop fine lateral root hairs specialized for oxygen uptake.
- Stage 3 — Harvest before the reservoir runs dry: If the container volume is matched to the crop’s total water demand, the plant reaches harvest size just as the reservoir approaches its final inch of solution.
Best crops for passive Kratky containers
Because stagnant nutrient solution warms up and concentrates faster than a large recirculating system, the Kratky method works best with fast-maturing, moderate-feeding crops:
- Top choices (4–6 week cycle): Loose-leaf and butterhead lettuce, bok choy and Asian greens, tatsoi, arugula, mustard greens, and Swiss chard.
- Reliable herbs: Basil, mint, and chives (though long-lived herbs eventually require careful partial top-ups).
- When to upgrade to DWC instead: Long-season, heavy-drinking crops like tomatoes, peppers, and cucumbers are much easier to manage in an aerated Deep Water Culture (DWC) or drip system—see our full Kratky vs. DWC comparison.
Container sizing: how much solution does one plant need?
In a true single-cycle Kratky grow, the container must hold all the water the plant will drink from transplant to harvest:
- 1 head of leaf lettuce or bok choy: 0.75 to 1 gallon (3–4 liters) of nutrient solution per plant. Wide-mouth 1-gallon jars (wrapped or painted opaque to block light and prevent algae) or a 5-gallon tote holding 4 to 5 heads of lettuce work exceptionally well.
- 1 compact basil plant (6–8 week harvest): 1 to 1.5 gallons (4–6 liters) of solution.
- Avoid pint or standard 1-quart (1 L) mason jars for full heads of lettuce: A 1-quart jar holds less than 750 mL of usable solution once the net cup is inserted, forcing you to top up every few days during the final two weeks of growth.
Setting the initial water level at transplant
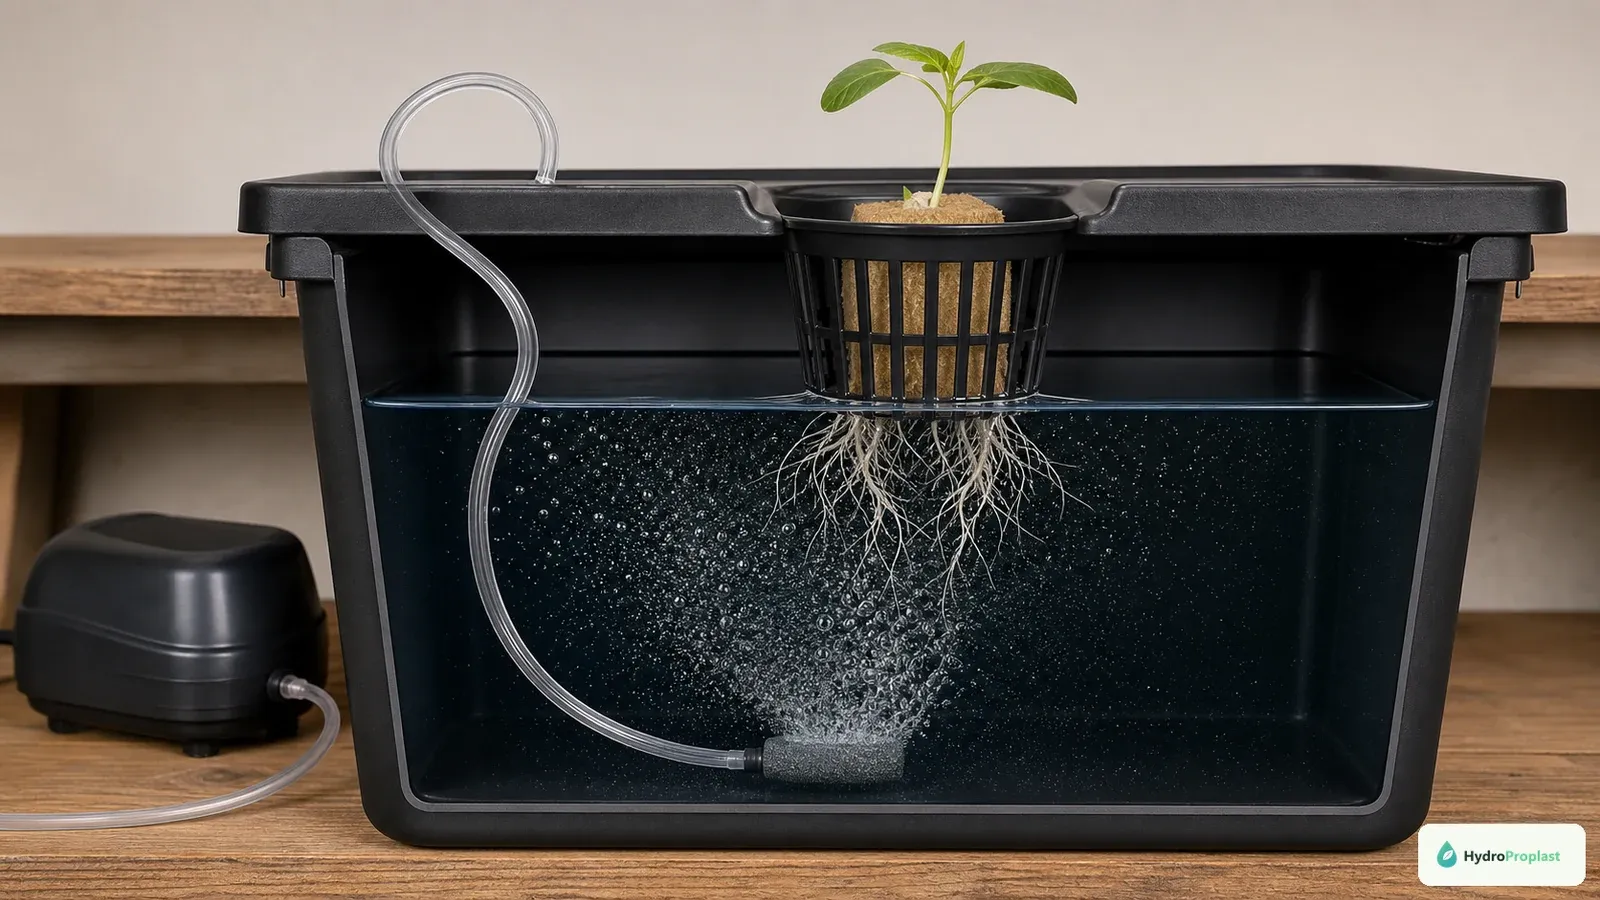 At transplant, fill the container only until solution touches the bottom 0.25 to 0.5 inch (0.5–1 cm) of the net pot so the starter plug stays moist by capillary action.
Use seedlings with clean white root tips already emerging from the bottom of a rockwool or sponge plug:
- Mix your beginner hydroponic nutrient solution to a mild-to-moderate strength (EC 1.0–1.3 mS/cm for leafy greens) and adjust pH to 5.8–6.0.
- Place the net pot in the lid and pour solution until the liquid touches only the bottom 0.25–0.5 inch (0.5–1 cm) of the net pot.
- Never submerge the entire starter cube. If the crown of the seedling sits in standing water, the stem can rot before oxygen roots ever form.
The golden rule when refilling a Kratky container
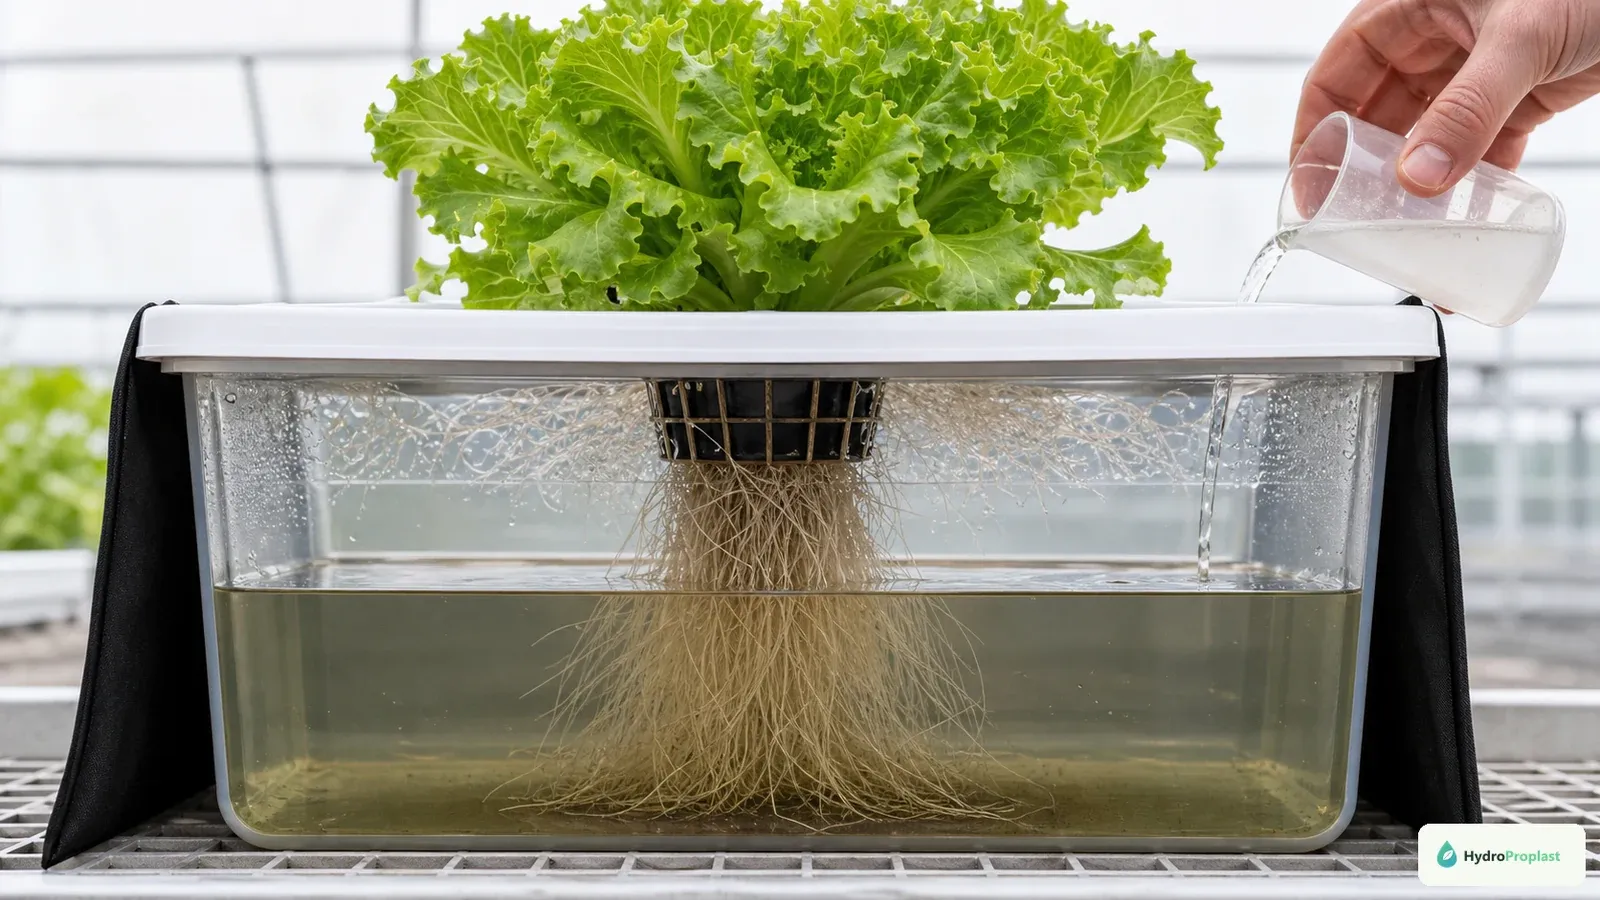 Never refill an established Kratky container back to the top; submerging air-adapted upper roots can suffocate the plant overnight.
If your container runs low before harvest and you need to add solution, never fill the container back up to the bottom of the net pot. The upper half of the root system has adapted to breathing humid air; submerging those oxygen roots in stagnant water will suffocate the plant within 24–48 hours and trigger root rot.
Instead, refill only to one-third or at most halfway up the container, leaving at least 2 to 3 inches (5–8 cm) of exposed upper roots in the air space above the liquid line.