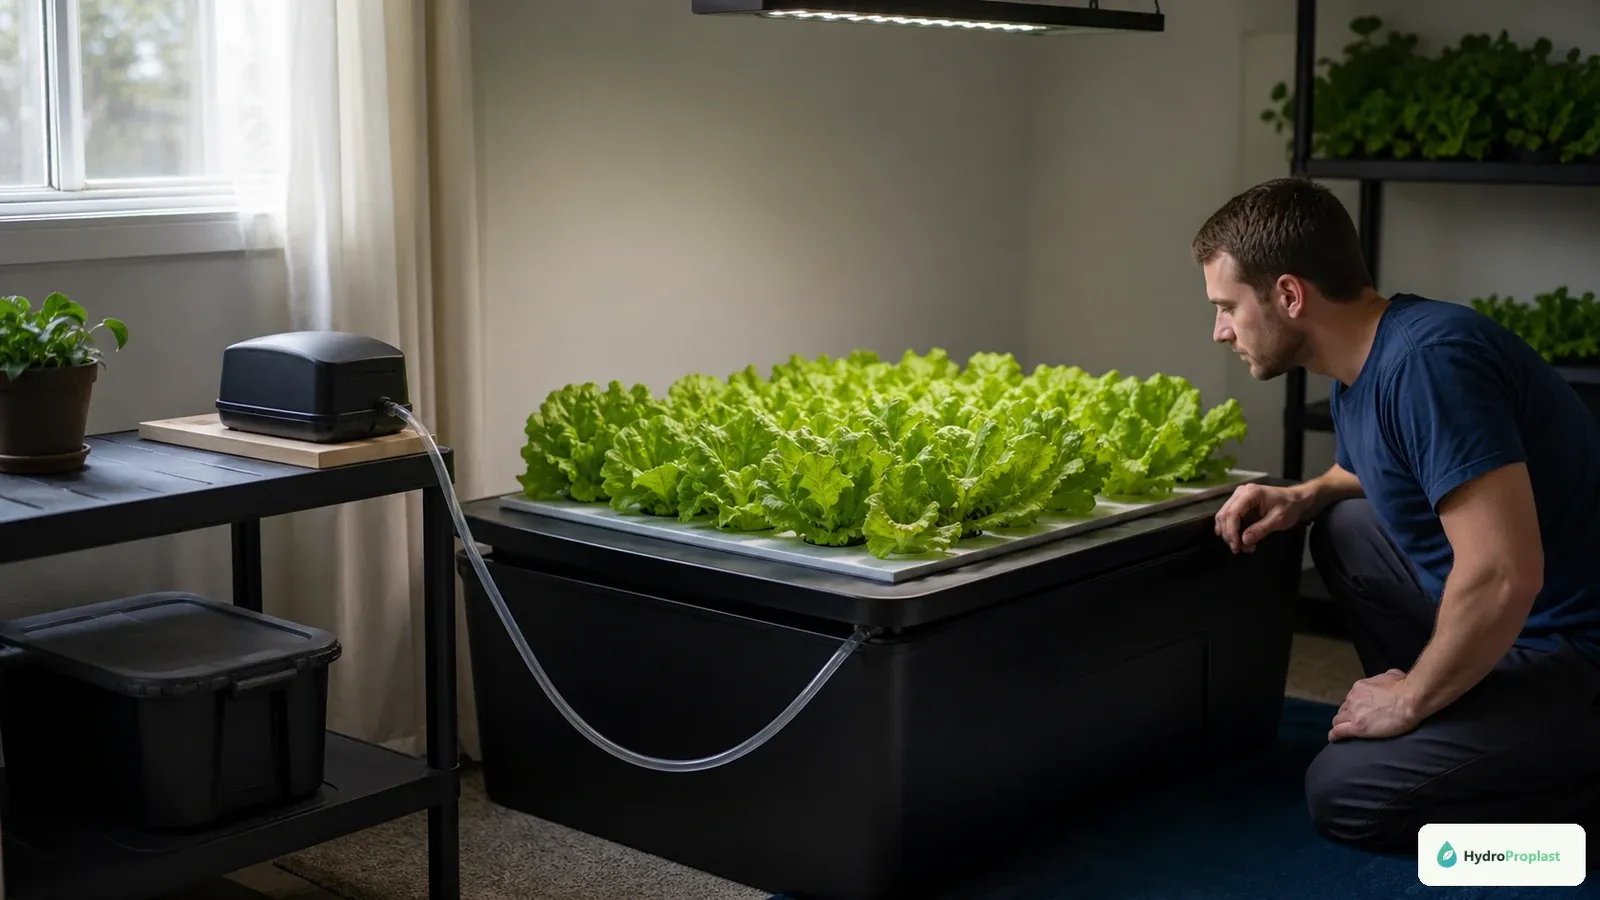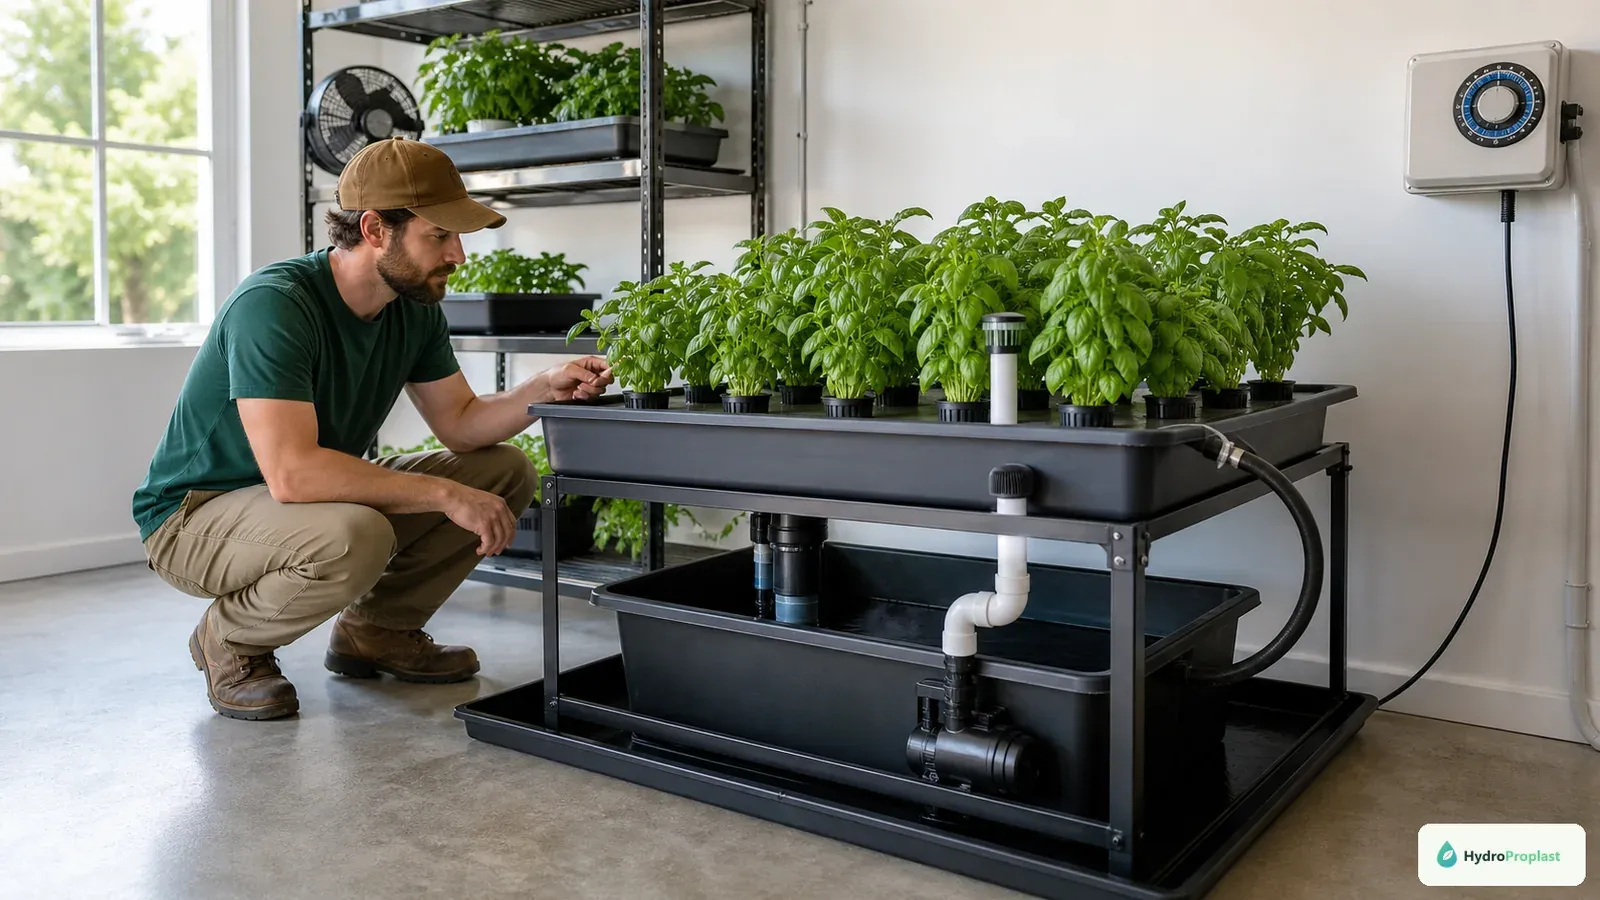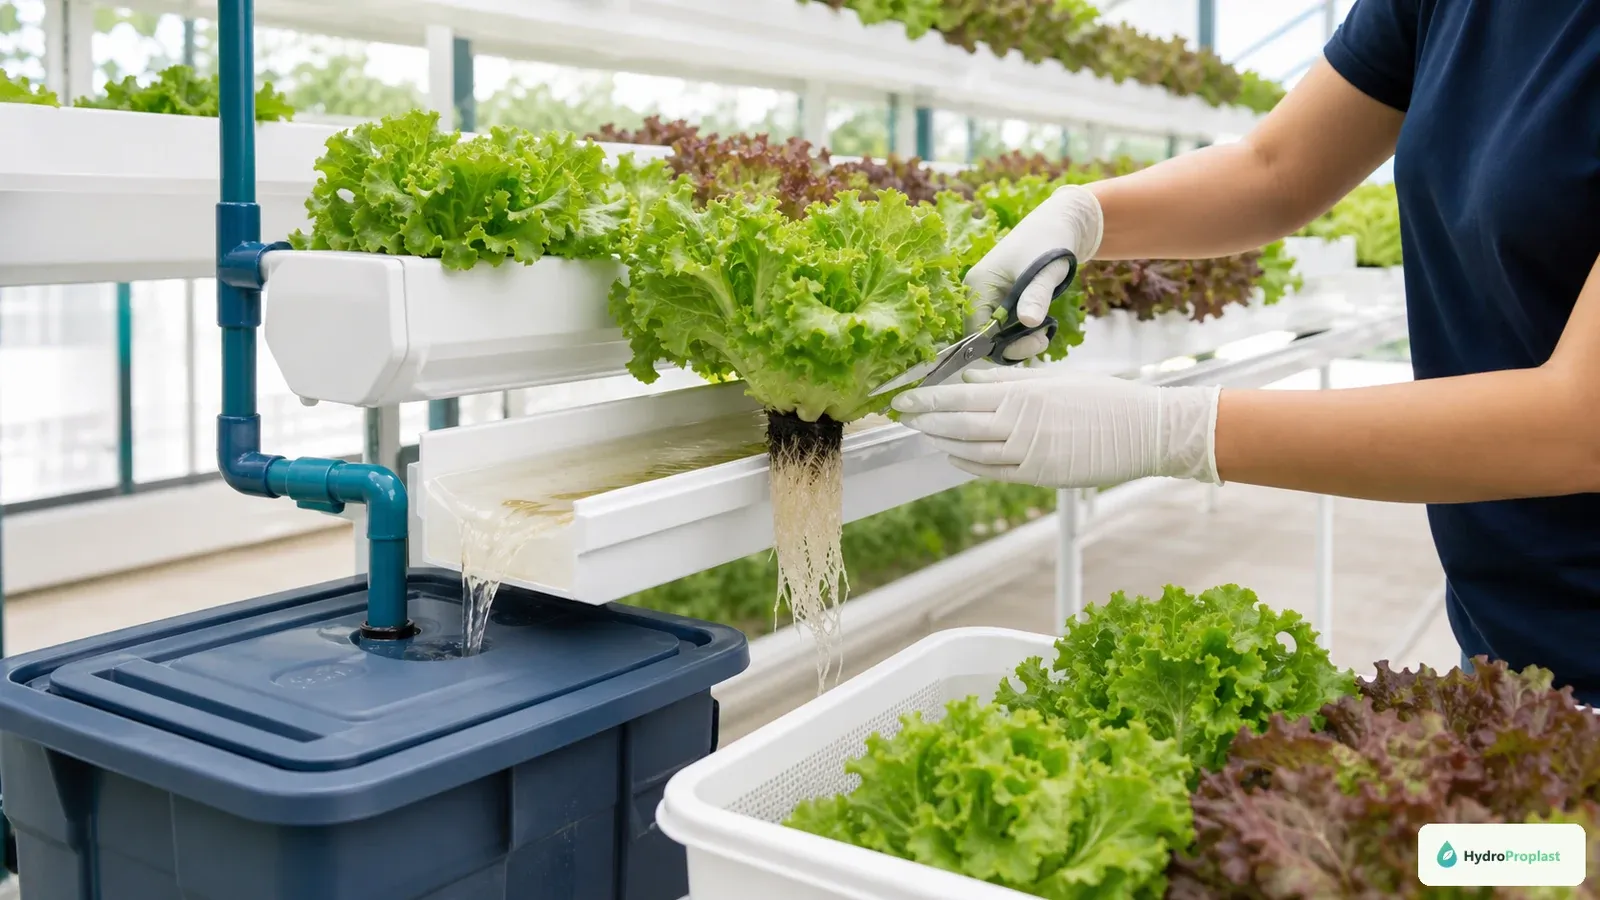
Transplanting a hydroponic seedling is a controlled handoff. The propagation plug has provided moisture and support; the production system must now provide reliable water, oxygen, light, nutrients, and physical stability. Success depends less on a fixed number of days than on seedling condition and whether the receiving system is ready.
Decide whether the seedling is ready
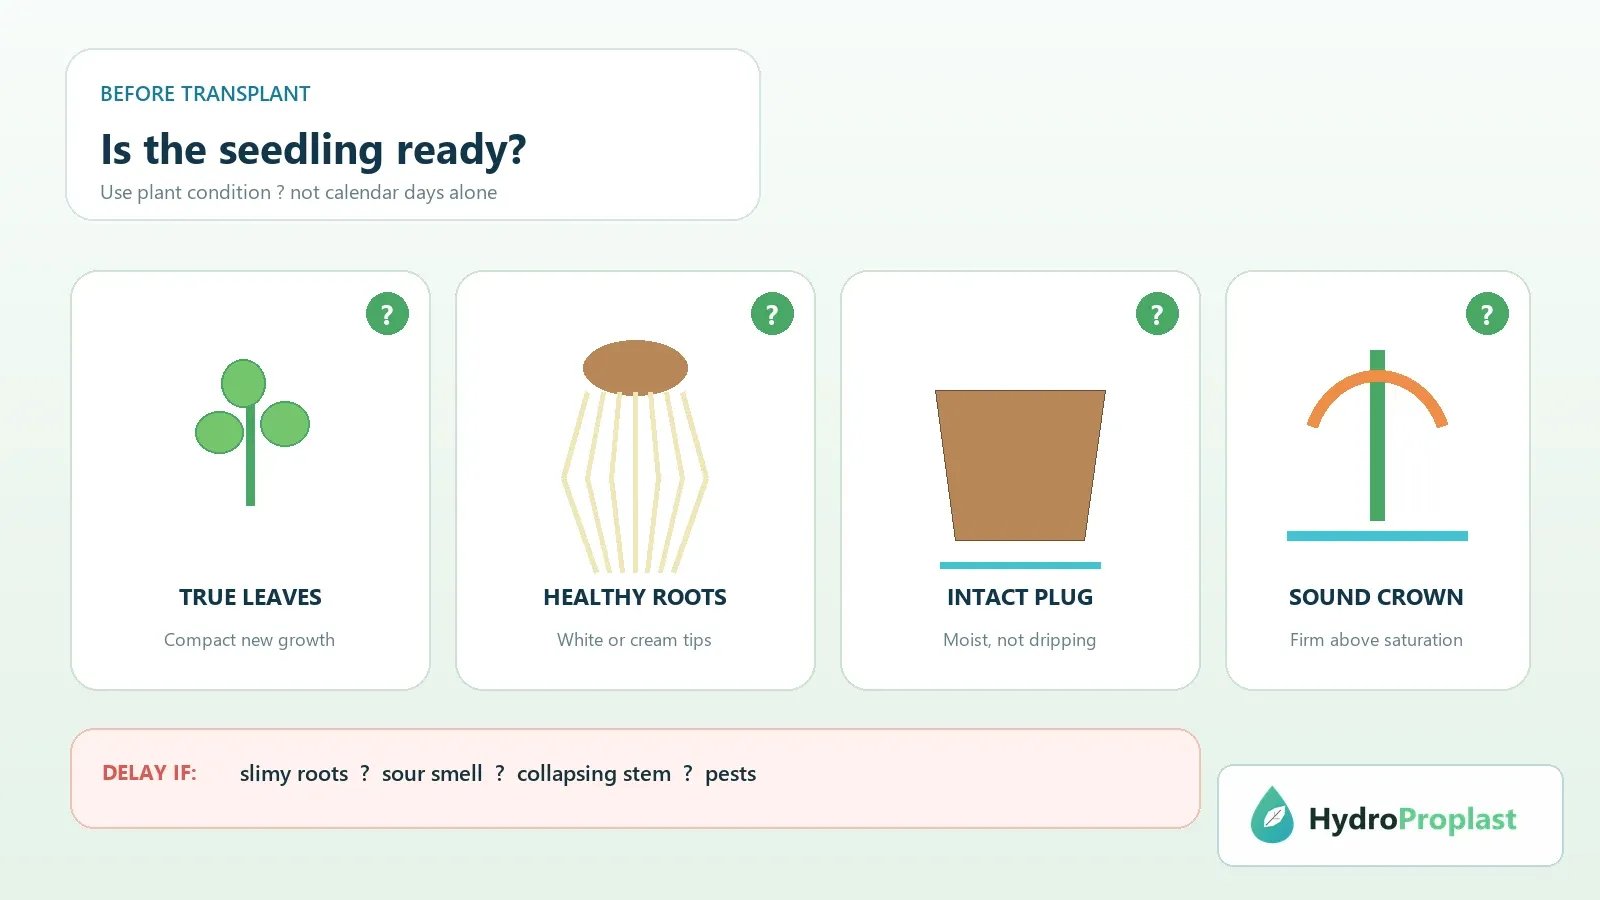
Use seedling condition, not calendar days alone, to decide when to transplant.
Look for an intact plug, visible healthy roots, an upright stem, and early true leaves appropriate to the crop. The seedling should be actively developing, not merely surviving in a saturated cube. Roots need not fill the plug, but they should be long enough to reach the new moisture zone or tolerate a short supported transition.
Delay transplant when the stem is collapsing, the plug smells sour, roots are slimy, or pests are present. A severely stretched seedling may be supported temporarily, but compact new growth and a sound crown matter more than saving every plant.
The hydroponic germination guide covers seedling preparation before this point.
Commission the empty system first
Fill and run the receiving system before removing seedlings from their tray. Confirm that pumps, air equipment, returns, drains, timers, and alarms work. Check for leaks and verify that every plant position receives the intended flow.
Measure solution temperature, pH, EC, and water level after complete circulation. Use a mild crop-stage-appropriate nutrient mix according to the product instructions. Do not transplant into an untested system and troubleshoot plumbing around exposed roots.
Number or label positions so later differences can be traced to flow, light, or handling.
Match the plug to its holder
The plug should sit securely without being crushed. A net pot or collar must support the plant while allowing roots to emerge. Surround a plug with rinsed clay pebbles or another compatible medium only when support and light exclusion require it.
Fine loose material can fall into pumps or remain too wet. A deep basket can extend too far into a shallow channel. Review actual dimensions in the net-pot guide and medium behavior in the grow-media guide.
Prepare the seedling tray
Water plugs early enough that they are evenly moist but not dripping during transfer. Separate tangled roots gently and discard loose debris. Keep labels with the plants.
Work in a clean area with clean hands and tools. Move healthy plants before suspect ones, or isolate questionable seedlings entirely. Do not return tray runoff to the production reservoir.
Arrange transport so roots are not exposed to bright light, dry airflow, or crushing. Transplant a manageable group rather than leaving every plug out while the first position is adjusted.
Handle the plug, not the stem
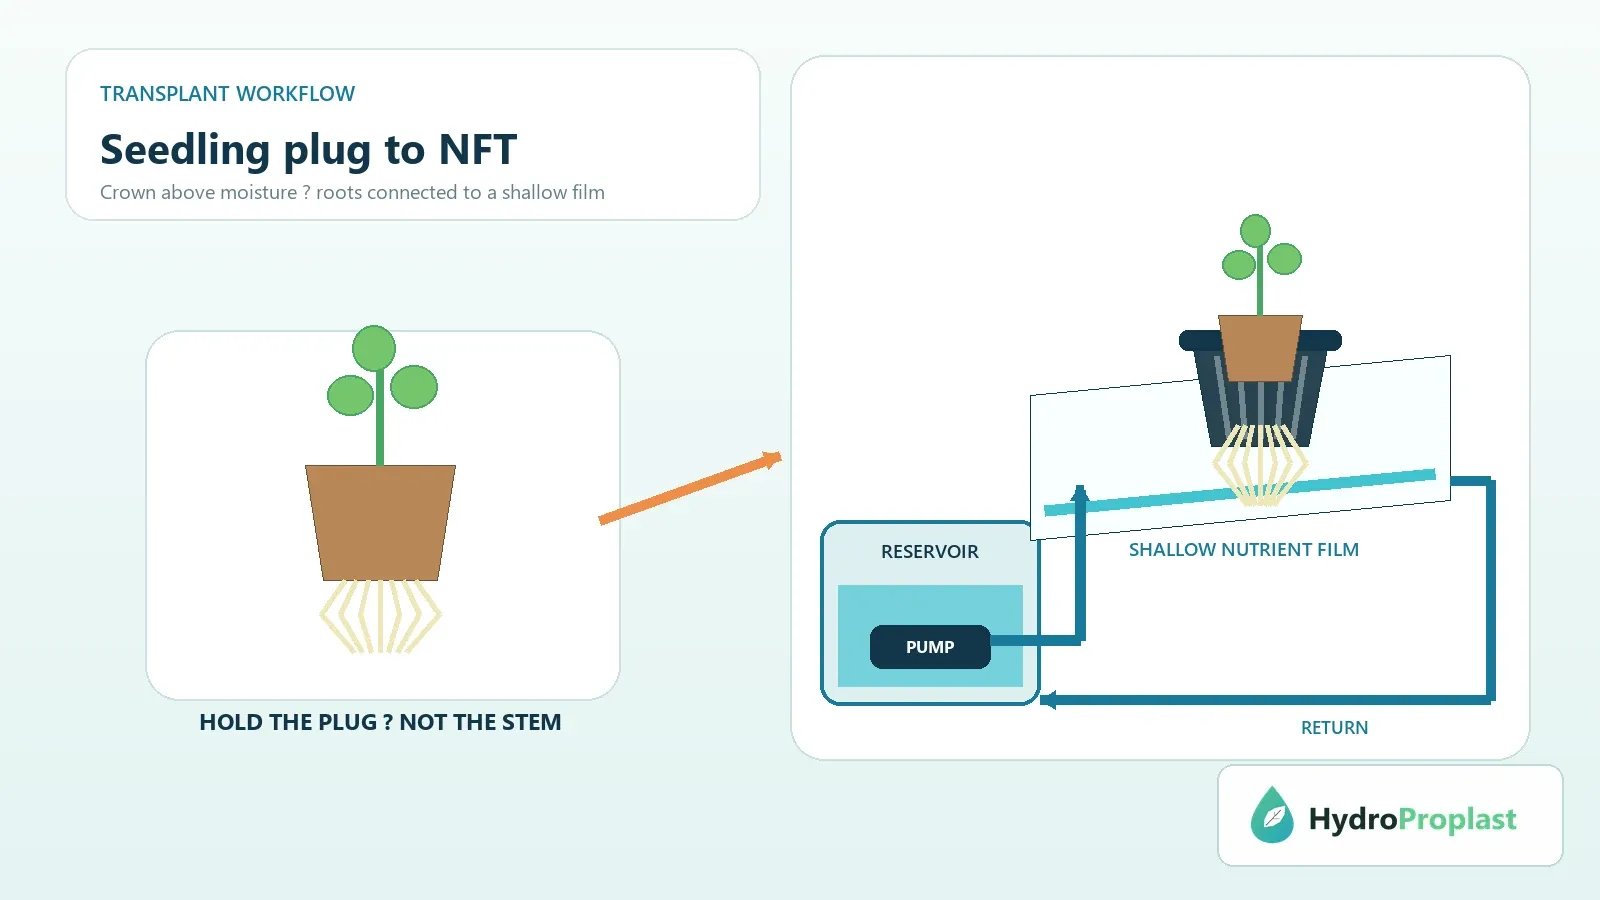
Lift from the plug or root-support material. A young stem is easily bruised and damage at the crown can become a failure point. Do not pull roots through a narrow slot or trim them merely to fit a basket.
If roots have grown into a fabric or tray, free the surrounding support rather than tearing the main root system. A slightly delayed transplant is often safer than forcing a bound plug.
Keep roots shaded and moist during the short transfer, but do not soak the crown in an open container.
Set crown and water height
The crown—the transition between stem and roots—should remain above persistent saturation. Lower roots need dependable moisture; upper root tissue and the crown need oxygen.
Initial height depends on root length, plug wicking, system type, aeration, and crop. Avoid universal statements such as submerging half of every net pot. Observe the actual plug after the system runs.
Mark the initial reservoir level. That reference helps distinguish evaporation, plant use, leakage, and an inappropriate top-up.
Transplant into DWC
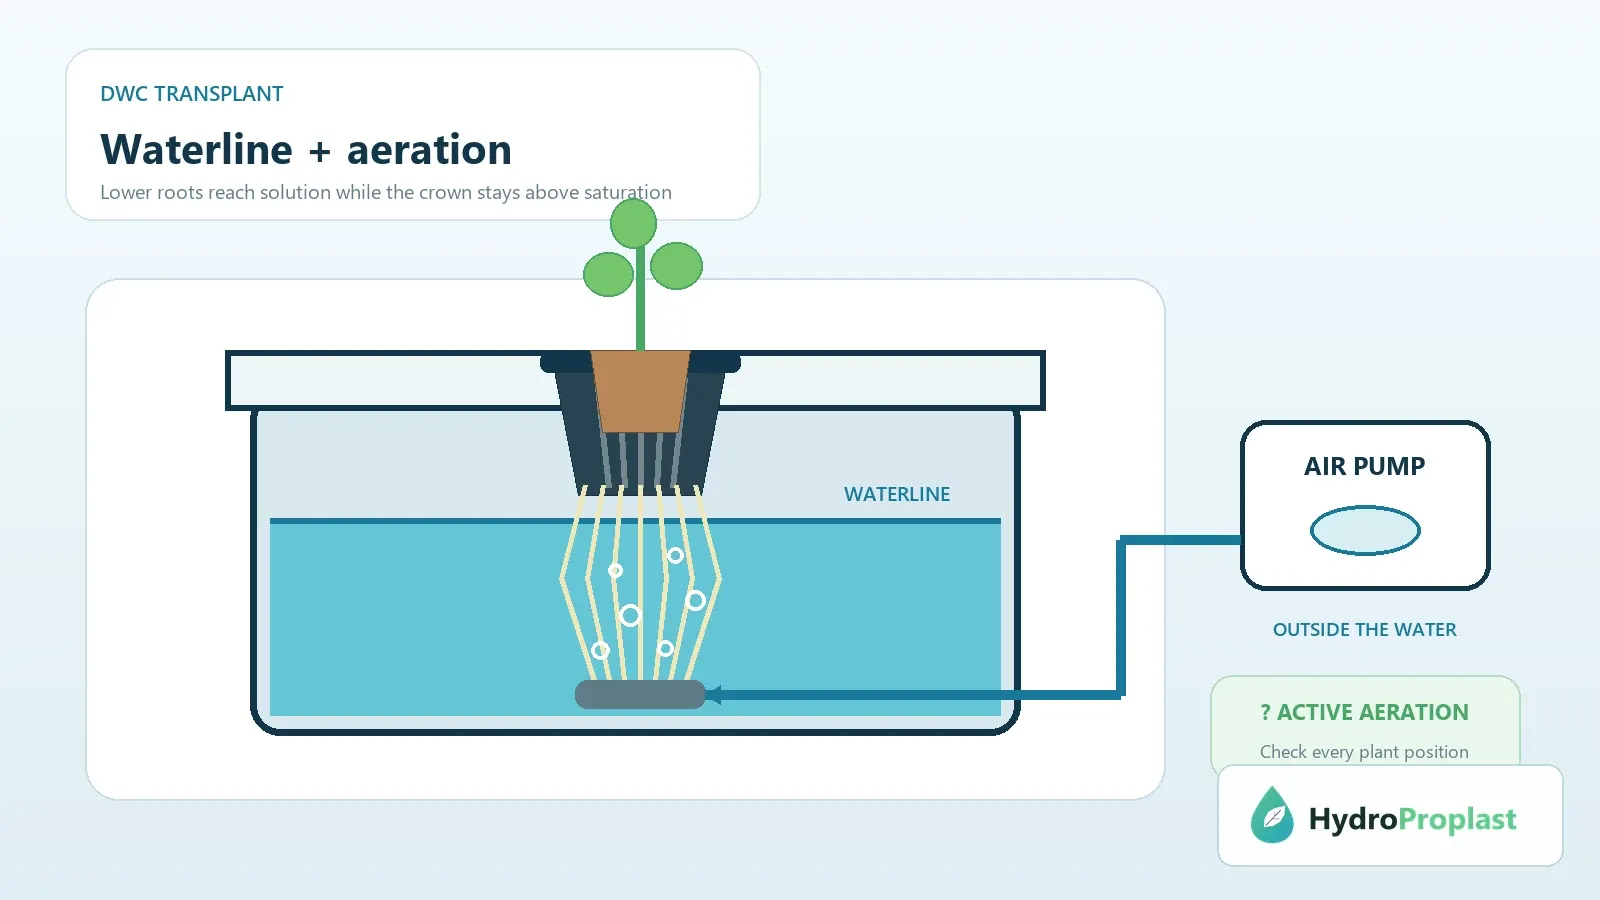
In DWC, keep the crown above persistent saturation and verify active aeration at every position.
In deep water culture, place the plug in its holder above an aerated reservoir. Established roots should reach solution, or bubbles and splashing should keep the lower support moist until they do. The upper plug must not remain waterlogged.
Confirm air distribution at every bucket or lid position. A running pump does not prove that a cracked tube or clogged stone supplies the plant. Keep the air pump protected against back-siphoning according to its instructions.
Recheck plug moisture several hours after transfer and during the first full light cycle.
Transplant into Kratky
A passive Kratky container depends on solution volume and a developing air gap. During establishment, the lower root or support must access moisture. As the plant uses solution, aerial roots occupy the gap.
Do not repeatedly refill to the original high level without understanding that root architecture. Avoid drowning roots adapted to air. The Kratky versus DWC guide explains the operational difference.
Use an opaque container and cover unused openings.
Transplant into NFT
In NFT, position the plug so emerging roots contact the shallow film without blocking the channel. Verify the slope, inlet, return, and flow before and after inserting plants.
A plug sitting above the film may dry before roots extend. A plug wedged too deeply can create a dam and keep the crown wet. Inspect the first, middle, and final channel positions because one visible return does not prove uniform delivery.
Have a pump-failure response; young NFT roots can dry quickly.
Transplant into drip media
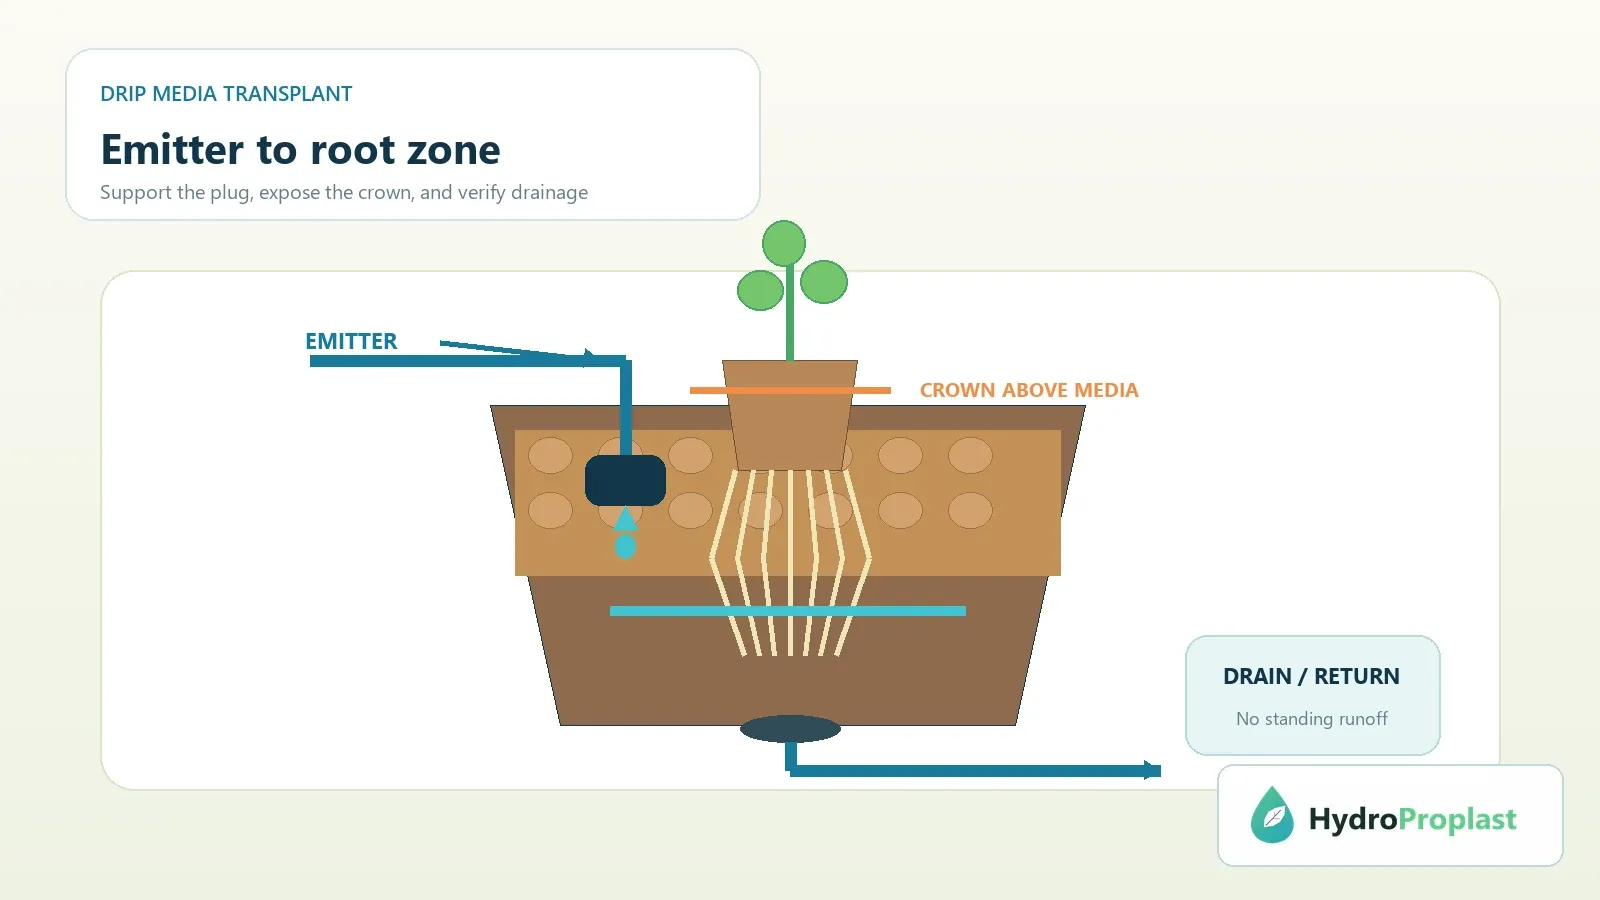
Aim the emitter at the root zone without burying the crown or leaving the container in runoff.
Place the plug at a depth that supports it without burying the crown. Position the emitter to wet the root zone evenly, not blast the stem or create a permanent saturated pocket.
Measure representative emitter output for a fixed interval. During establishment, irrigation frequency should reflect container size, medium retention, plant size, heat, and drainage. Copying another room’s timer can cause drought or oxygen deprivation.
Collect runoff only when the management method requires it, and do not let containers stand in it unintentionally.
Bridge the establishment gap
Some roots do not immediately reach the production moisture zone. Temporary hand watering with appropriate solution can bridge that gap. Apply enough to moisten the plug and root path without flooding the crown.
Label plants needing assistance and stop temporary watering once roots establish. Continuing both hand watering and normal irrigation can keep the plug saturated.
A wick may help in a suitable design, but it must be clean, compatible, and removed or managed if it changes later water behavior.
Introduce production light gradually
A propagation tray may receive less light than the main canopy. Moving a tender seedling directly under an intense fixture can cause bleaching, curling, or wilt. Begin at a verified lower intensity or greater distance and increase delivery gradually.
Do not leave seedlings under weak light for many days after transfer; they can stretch while roots establish. Measure canopy PPFD where possible and preserve a dark period.
Inspect edge and center positions separately. Uniform transplant quality can still produce uneven growth under an uneven fixture.
Monitor the first 72 hours
During the first day, check leaf posture, crown condition, plug moisture, root access, pump or air operation, and temperature. Over the next two days, look for new root tips and continued leaf expansion.
A brief pause can be normal. Progressive wilt, a saturated soft stem, sour odor, or increasing discoloration is not. Compare with an unaffected plant and verify the local plant position before changing the shared reservoir.
Record transplant time, system position, initial readings, and any temporary watering.
Diagnose failure by position and timing
One failed plant suggests handling injury, a damaged plug, blocked emitter, local light, or poor holder fit. Every plant failing after transfer suggests shared solution, temperature, water level, light, or system operation.
Failure immediately after moving differs from decline a week later. Build a timeline. Do not add nutrients because a wilted seedling looks pale.
Inspect roots before treatment. Firm new tips support recovery; decomposing roots or a collapsing crown may justify replacement.
Recover or replace
Recover a seedling when the crown is sound, roots retain healthy tissue, and the cause has been corrected. Support a leaning stem without constriction, stabilize moisture, and keep other variables steady.
Replace a plant with damping-off, extensive root decay, severe mechanical damage, or no meaningful new growth when a reserve plug is available. A weak transplant can occupy a production site while creating sanitation risk.
Keep a small staggered reserve rather than overcrowding the main system.
Record and improve the method
For each batch, document seed lot, sowing date, transplant stage, plug, holder, system, water height, nutrient baseline, light transition, survival, and days to active new growth.
Map failures by position. Repeated loss at one channel end is a plumbing problem; repeated saturated crowns indicate height or irrigation design. Improvement should follow the evidence.
University of Minnesota Extension’s indoor seed-starting guidance covers seedling handling and light. Penn State Extension’s seed and seedling biology provides developmental context.
A successful transplant is not simply alive after one hour. It has a dry sound crown, new roots in the intended zone, compact new leaves, and no continuing need for emergency support.
Use a transplant-day worksheet
Before work begins, write the receiving reservoir volume, solution temperature, pH, EC, water height, pump or air status, fixture setting, and planned number of positions. Confirm that spare plugs, clean support media, labels, and a backup pump or watering method are available. This worksheet prevents a missing fitting or untested timer from being discovered while roots are exposed.
For each seedling, assign a position and mark one of three starting conditions: fully established roots reaching the production zone, short roots needing a temporary moisture bridge, or questionable condition requiring separate observation. Do not place a questionable crown between healthy transplants simply to fill the lid.
After six hours, revisit the short-root group first. Feel or weigh plugs consistently, inspect leaf angle, and confirm that the lower support is moist. Add temporary solution only where evidence supports it. At twenty-four hours, document whether roots have extended beyond the basket or plug. At seventy-two hours, remove the temporary-support label when the production system supplies the root zone reliably.
Account for crop differences
Crop differences matter. Lettuce and basil plugs may move into small holders, while tomato, pepper, and cucumber seedlings require a plan for future root volume and structural support. Strawberries are transplanted as crowns or plugs with different crown-height risks. Do not generalize deep planting practices from tomatoes to crops whose stems or crowns decay when buried.
Follow a transplant sanitation checklist
- Wash hands and prepare a clean work surface.
- Keep production-system tools separate from floor and drain tools.
- Move healthy plants before suspect plants.
- Do not dip multiple root systems into a shared inspection cup.
- Remove dropped leaves, media, and damaged roots immediately.
- Clean and process reusable trays before the next sowing.
Quarantine outside transplants
If a transplant arrives from another nursery or outdoor area, quarantine and inspect it before the shared reservoir. Look beneath leaves and around crowns for pests, eggs, webbing, spots, and decay. Soil-grown starts are not converted safely by washing soil into a recirculating system; starting clean hydroponic plugs is usually a clearer route.
Evaluate transplant quality as a batch metric
Evaluate transplant quality as a batch metric. Calculate survival after one week, but also count plants with compact new leaves, firm new roots, and no ongoing hand watering. A nominally living seedling that remains stalled should not inflate the success rate.
Use records to refine the method
At crop turnover, compare transplant records with final performance. If early weak roots predict later small plants, tighten the readiness gate. If one holder type repeatedly saturates plugs, change the geometry. If failures cluster beneath one fixture edge, correct the light map. The best transplant procedure becomes specific through these feedback loops.