Germinate for a clean transfer, not directly in the reservoir
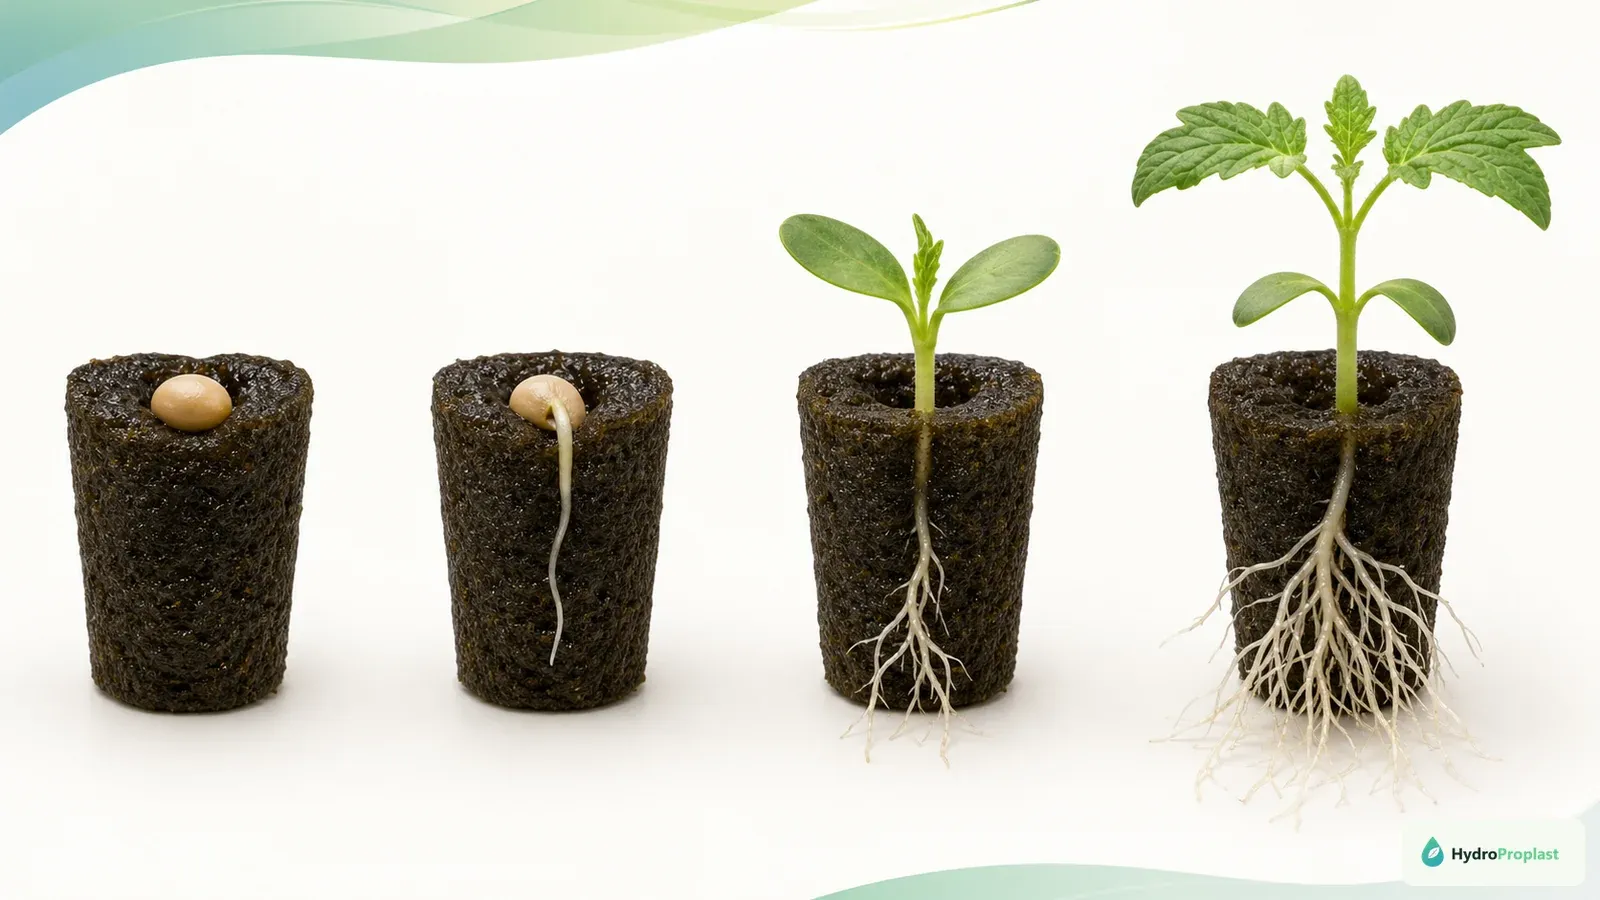
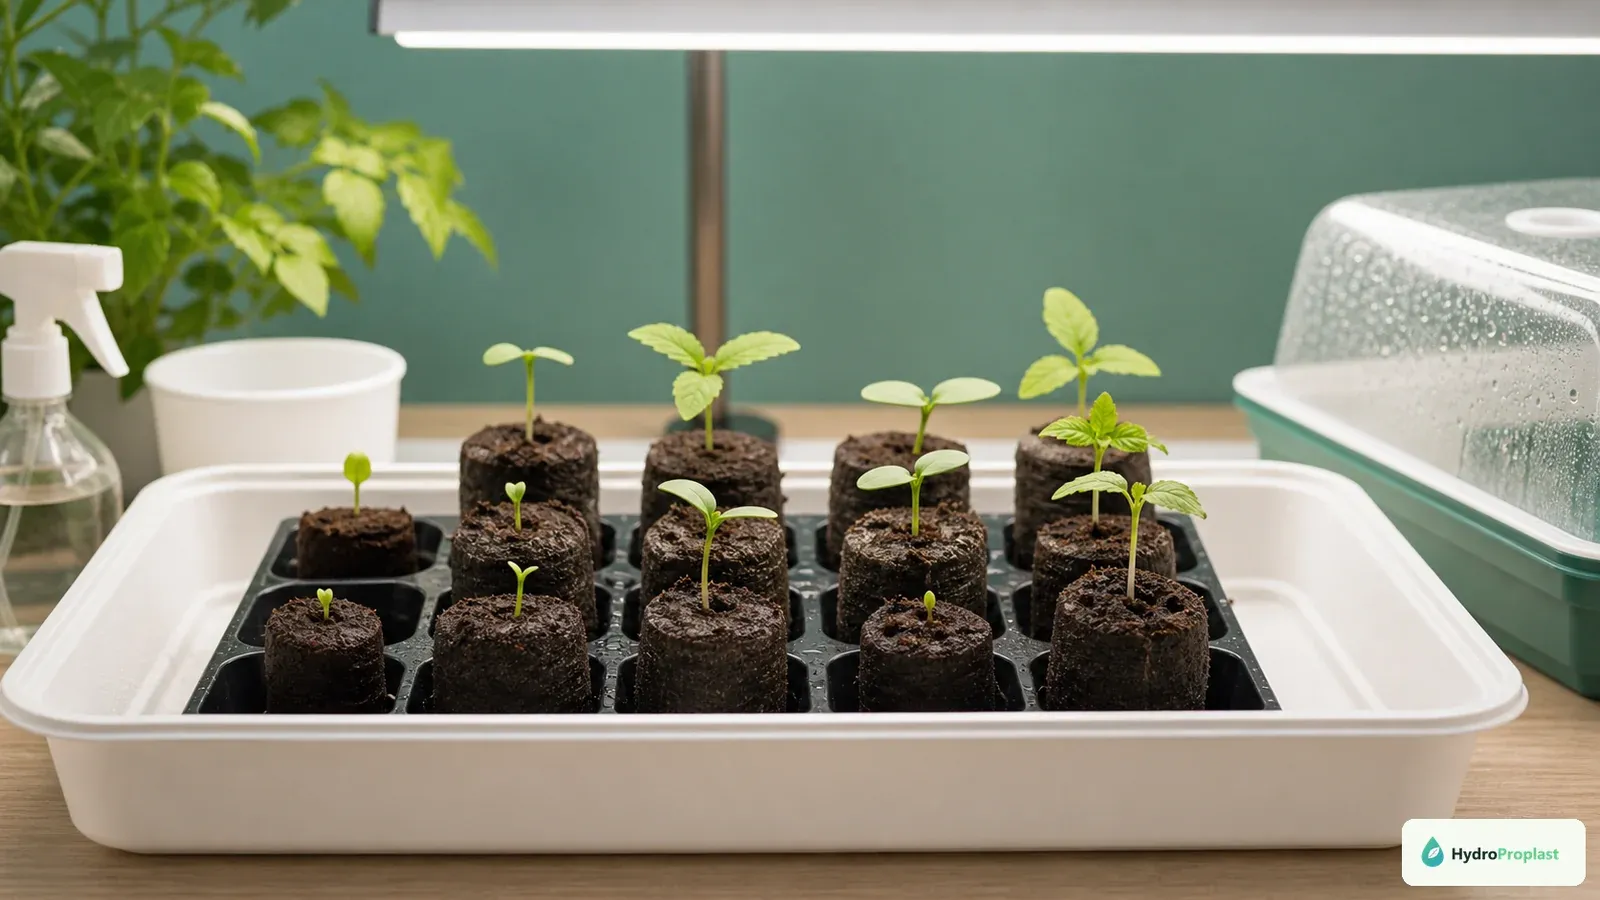
The most reliable beginner method is to start one seed per small clean plug or cube, keep it evenly moist and warm according to the seed packet, provide bright light as soon as shoots emerge, then move the seedling when true leaves and visible roots show that it can establish in the hydroponic system.
Seeds need moisture, oxygen, and a suitable temperature to germinate; some also need light or darkness. They do not need full-strength nutrient before stored seed reserves are used. The objective is a compact seedling whose roots remain inside a transferable plug—not the fastest possible sprout.
University of Minnesota Extension’s indoor seed-starting guidance recommends following packet depth, labeling containers, separating seedlings to avoid root injury, and supplying close bright light after emergence.
Seed germination quick checklist
- Use fresh seed and one clean, correctly sized plug per planting site.
- Follow the seed packet for sowing depth and temperature.
- Keep the plug evenly moist and airy, never submerged.
- Provide bright, even light immediately after emergence.
- Start mild complete nutrition only when crop guidance and true-leaf development indicate it.
- Transfer when the plug holds together and healthy roots are visible outside it.
Choose seed for the system and space
Start with fresh seed of a crop that fits the mature system. Lettuce, basil, compact herbs, and many Asian greens are easier first candidates than a sprawling cucumber or indeterminate tomato. Check cultivar size, days to maturity, temperature preference, and whether pelleted seed has special storage or moisture instructions.
Plant more cells than final sites so weak or failed seedlings can be excluded, but avoid sowing several seeds in every tiny plug when roots will tangle. If two seedlings emerge, cut the weaker at plug level rather than pulling and disturbing the selected root.
Label crop, cultivar, sowing date, and seed lot. Similar cotyledons are hard to identify later, and timing differences help diagnose viability versus environment.
Match the starter medium to the final holder
Mineral-wool cubes, purpose-made foam plugs, coir plugs, and fine soilless mixes can all work when they stay moist while retaining air. The plug should fit the final net pot or plant collar and remain intact during transfer.
Oklahoma State University’s soilless media guide compares mineral wool, coir, perlite, vermiculite, and other materials by water retention, aeration, durability, and chemistry. No medium is best for every irrigation method.
Prepare it according to manufacturer guidance. Some mineral-wool products require conditioning; coir quality and salts vary; loose perlite creates dust and can wash away. Wear the stated protection and avoid inhaling dry fibers or dust.
Sanitation before sowing
Use clean trays, domes, labels, tools, and hands. Reused equipment should be washed and sanitized using an appropriate labeled process, then rinsed where required. Do not reuse plugs from a diseased crop.
Begin with potable or otherwise crop-appropriate water. Keep seeds and clean plugs away from old roots, nutrient spills, and algae. A humidity dome can reduce moisture loss but also traps condensation and stale air; remove or vent it promptly after emergence.
Damping-off organisms can collapse a seedling at the medium line. Clean material, drainage, appropriate temperature, and avoiding saturation reduce risk. A fallen pinched seedling rarely recovers reliably enough for a hydroponic crop.
Sow at the correct depth
Follow the packet because seed species differ. A common fallback is roughly twice the seed’s width, but seeds requiring light should remain at or near the surface under the recommended cover.
Make a small hole rather than compressing the whole plug. Place the seed, close gently if required, and moisten without washing it deeper. Keep one seed centered so roots develop through the plug instead of along its edge.
Record which cells contain seed. Empty-looking cells should not be repeatedly excavated; disturbance can damage an emerging root.
Moist, not submerged
Hydrate plugs fully, then let excess drain. During germination, maintain consistent moisture without leaving cubes sitting deep in water. Saturated media restricts oxygen; dry media can stop germination.
Bottom moisture can be more uniform than hard overhead spraying, but the tray should not become a permanent reservoir. Lift or weigh representative plugs to learn their wet and drying states.
Use plain water initially unless crop and product guidance specifies a mild starter solution. Seed reserves support emergence. Strong nutrient can raise osmotic stress and injure young roots.
Temperature belongs to the seed, not a generic chart
Consult the seed packet or authoritative crop guide. Warm-season tomato and pepper germination often benefits from bottom heat, while lettuce can germinate poorly when excessively warm. Air temperature does not guarantee plug temperature near a cold window.
A thermostatically controlled heat mat is safer than an unregulated heater, but verify actual medium temperature with an appropriate probe. Remove or reduce bottom heat after emergence when crop guidance calls for cooler seedling growth.
Do not place a covered tray in direct sun; it can overheat rapidly. Stable moderate conditions are more useful than forcing the shortest germination time.
Light must be ready before shoots appear
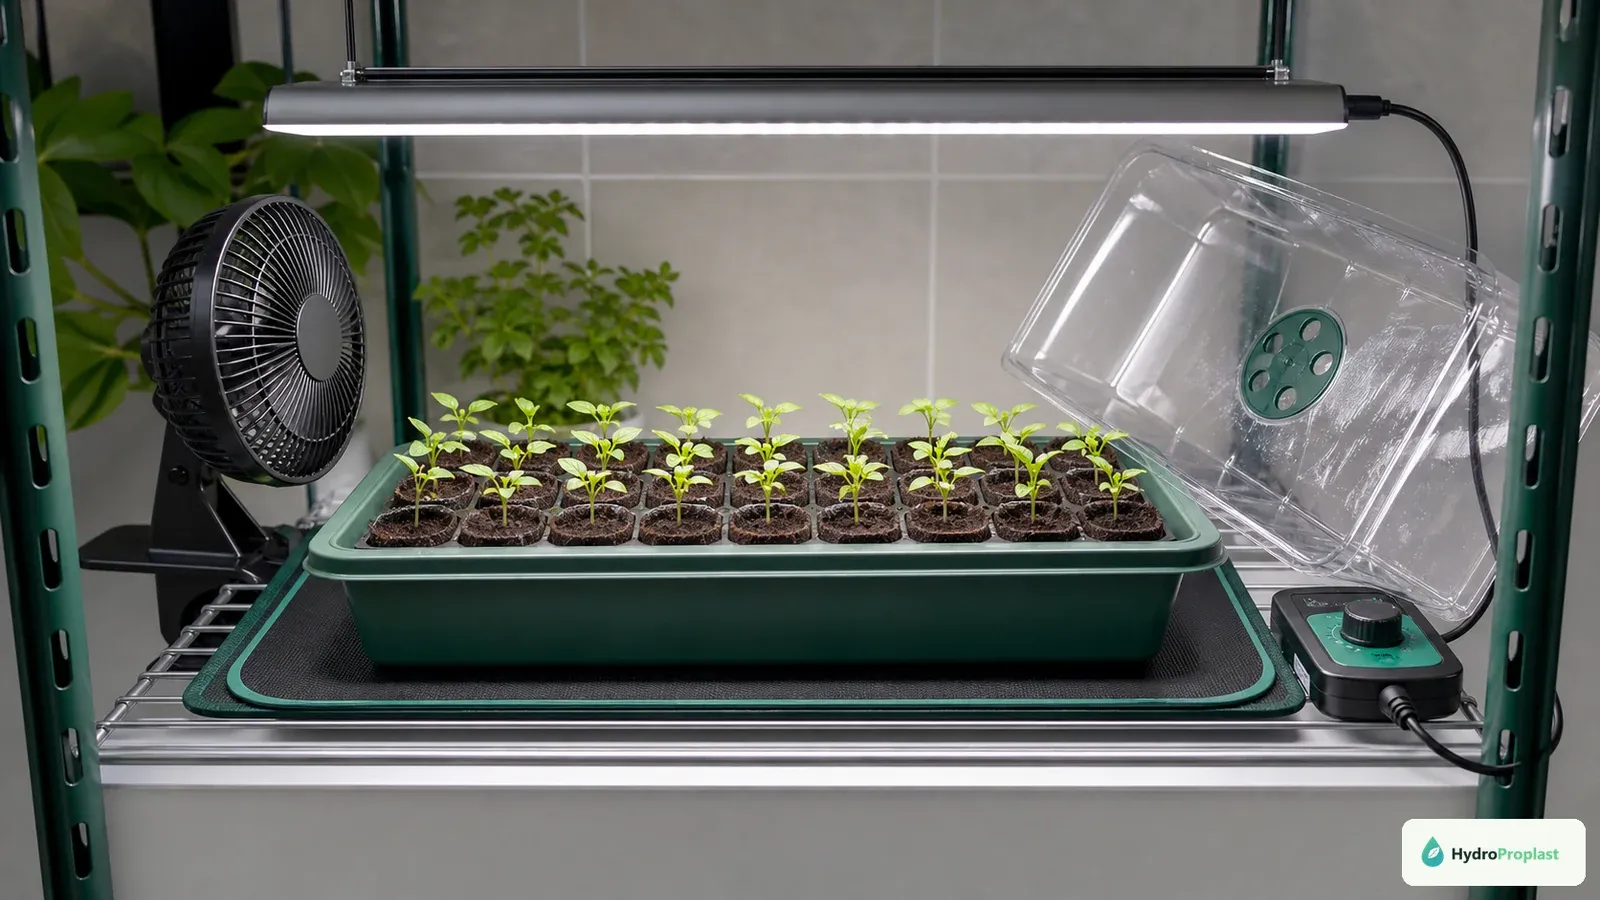
Germination may occur in darkness for crops that permit it, but seedlings need bright light immediately after emergence. Waiting several days produces long weak stems that cannot be “un-stretched.”
The University of Minnesota’s lighting guide explains that insufficient light causes long thin growth and gives seedling-specific distance and duration guidance. Follow the actual fixture manufacturer as intensity and heat vary.
Use a timer and preserve a dark period. Raise the fixture as plants grow, keeping distribution even across edge cells. Rotate trays only as a supplement to uniform lighting, not a substitute.
From cotyledons to true leaves
The first seed leaves are cotyledons. True leaves follow with the crop’s characteristic shape. Begin mild complete hydroponic nutrition when seed reserves and crop guidance indicate, often around true-leaf development, rather than from the first hour of germination.
Mix a complete formula at seedling-appropriate strength, check pH, and avoid pouring concentrate onto plugs. Monitor EC only as a total-concentration guide; it cannot identify each nutrient.
Pale or slow seedlings may lack light, have damaged roots, be too wet, too cold, or need nutrition. Diagnose the environment before increasing feed.
Prevent leggy seedlings before transfer
Keep light adequate and close within fixture guidance, avoid excessive heat after emergence, provide gentle air movement, and do not overcrowd. A fan should move leaves slightly, not dry plugs or blast stems.
If seedlings already stretch, correct light immediately, support them temporarily, and evaluate whether restarting will produce a better crop. The leggy-seedling guide gives a recovery decision tree.
Do not bury every stretched stem deeply unless the crop tolerates it. Lettuce, basil, and tomato respond differently, and a wet buried stem can rot.
Decide when the seedling is ready
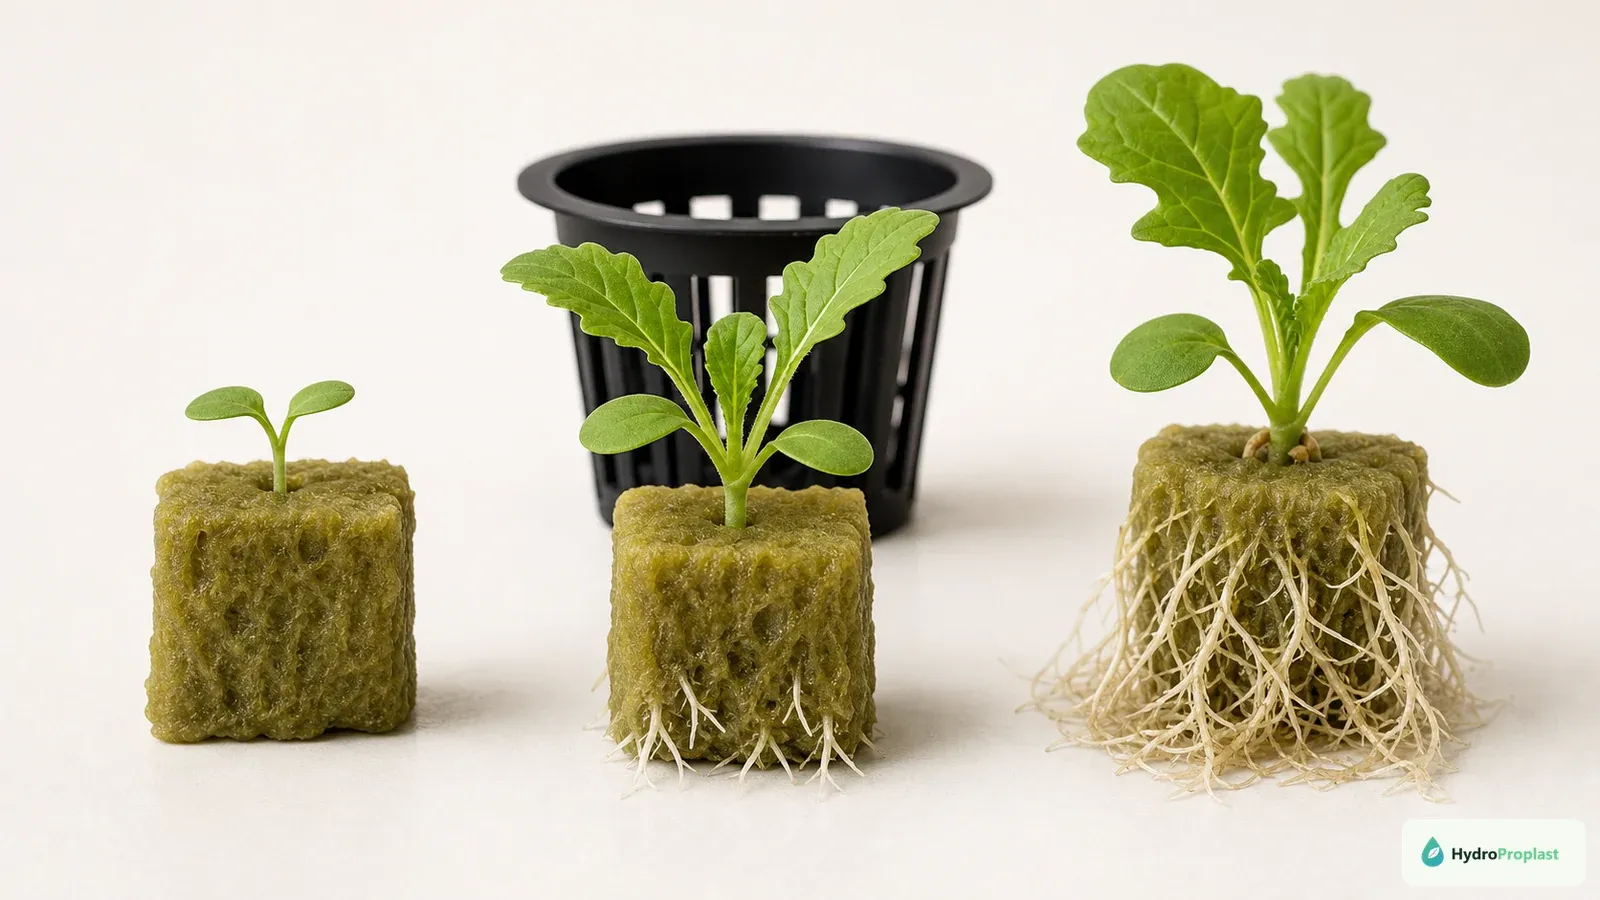
Transfer when the plug holds together, true leaves are developing, and healthy roots reach the outside far enough to access final moisture. Do not wait for roots to weave through neighboring cells or form a dense mat.
The final system must already be water-tested, mixed, pH-checked, aerated or flowing, and lit. A healthy seedling placed into a failed pump system is not ready because the hardware is not ready.
Handle by the plug or leaves rather than squeezing the stem. Damaged roots should not be trimmed routinely. Keep roots moist during the short move and shield them from intense light.
Set the transfer height correctly
In DWC, young roots or the bottom of the moist plug must reach an appropriate moisture zone while the stem remains dry and supported. In NFT, ensure initial flow wets young roots without submerging the crown. In drip media, place delivery where the plug receives moisture until roots expand.
In Kratky, starting solution height is part of the method; later refilling should preserve the air gap. Net pots should hold the plug without squeezing it or letting it fall into solution.
Our net-pot guide connects basket size, media containment, and plant support.
First 72 hours after transplant
Check moisture and delivery several times without constantly moving the seedling. Confirm pump, bubbles, or wick contact. Keep light appropriate for acclimation but do not return the plant to darkness.
Some brief adjustment is possible, but persistent wilt, stem collapse, or browning roots requires inspection. Verify solution strength, pH, temperature, and root contact before adding nutrient.
Record transfer date and reject clearly diseased seedlings so one weak plant does not introduce problems to a shared reservoir.
Troubleshoot germination patterns
No cells germinate: check seed age, temperature, moisture, depth, and whether the species requires light or darkness.
One variety fails while others succeed: suspect seed lot or crop-specific conditions rather than rebuilding the whole tray.
Seeds rot: reduce saturation, improve cleanliness and temperature, and use fresh medium.
Uneven emergence: check tray-edge drying, heat-mat distribution, sowing depth, and seed quality.
Seed coats stick: maintain appropriate humidity briefly and avoid pulling tissue from cotyledons.
Run a small germination audit
Count seeds sown, emerged, and transferred. Record days to first and final emergence, temperature range, plug type, water, and light start. Photograph healthy roots and representative failures.
This identifies whether extra sowing is needed next time and prevents vague claims that a medium “did not work.” Compare one variable at a time, such as plug type, while using the same seed lot and environment.
Use Best Grow Media for Hydroponics before changing materials. A clean repeatable routine usually improves results more than buying an elaborate germination kit.
Practical crop notes:
Lettuce usually germinates quickly under moderate warmth and should receive light soon after emergence. Basil often benefits from warmer conditions but still needs air movement and prompt light once it opens. Parsley can be slow and uneven, so do not discard a labeled plug after only a few days. Tomatoes, peppers, and cucumbers need more room and should not remain in tiny propagation cells once roots and leaves expand.
Treat these as behavioral tendencies, not promises. Cultivar, seed age, storage, temperature, and moisture change the result. Use the seed packet as the primary timing reference and record the actual response in your room.
A seven-day observation routine:
On day zero, label the tray, count seeds, and record the medium, water, and temperature. During the first days, check moisture by weight and appearance without repeatedly opening or moving every plug. Remove standing water. When the first seedlings emerge, provide appropriate light and gentle air movement.
Each day, note how many seeds emerged, whether stems are upright, and whether the plug smells clean. A sour odor, algae film, collapsed stem, or stalled root deserves attention. At the end of the week, calculate germination percentage only for varieties whose expected window has passed. This small record distinguishes poor seed from a faulty environment and prevents changing several variables at once.
Before moving a seedling to the main system, confirm that the plug holds together, roots are healthy and visible, true leaves are beginning to develop, and the final system is clean and operating. Match solution strength to young plants, protect the crown from continuous saturation, and observe the transplant closely for several days. A seedling that pauses briefly may be adapting; progressive wilt, bleaching, or stem collapse is not normal.
Keep a small reserve of later-sown plugs when a full planting matters. Replacements are easier to manage in propagation than after an empty channel space has disrupted canopy and harvest timing.
Use a germination log to improve future batches. Record the cultivar, seed lot, sowing depth, number sown, emergence dates, and number of usable transplants. Add daily minimum and maximum temperature if the room changes noticeably. A tray with ninety percent emergence but only half usable transplants points to a post-germination problem, while low emergence across uniform plugs points toward seed quality, moisture, or temperature.
Store unused seed cool, dry, dark, and in a sealed labeled package according to supplier guidance. Do not leave packets in a humid grow room. When comparing old and new seed lots, sow a small counted sample under identical conditions before committing every channel. This simple test protects the crop schedule and prevents diagnosing the hydroponic nutrient solution for a failure that occurred before roots ever reached it.