Yellow leaves are a signal, not a diagnosis. In hydroponics the same color change can follow normal aging, root damage, unsuitable pH, excessive nutrient concentration, a genuine deficiency, poor light, heat, or pests. Adding more fertilizer before identifying the pattern can turn a correctable problem into nutrient burn.
Use this diagnosis-first process to decide what changed, which measurements matter, and what to correct first.
Stabilize the system before treating symptoms
Check for urgent failures: a stopped pump, empty reservoir, exposed roots, severe heat, blocked flow, or electrical hazards. Restore circulation or aeration, shade an overheated reservoir, and correct a dangerously low solution level. Do not add concentrated nutrients or pH adjuster directly beside roots.
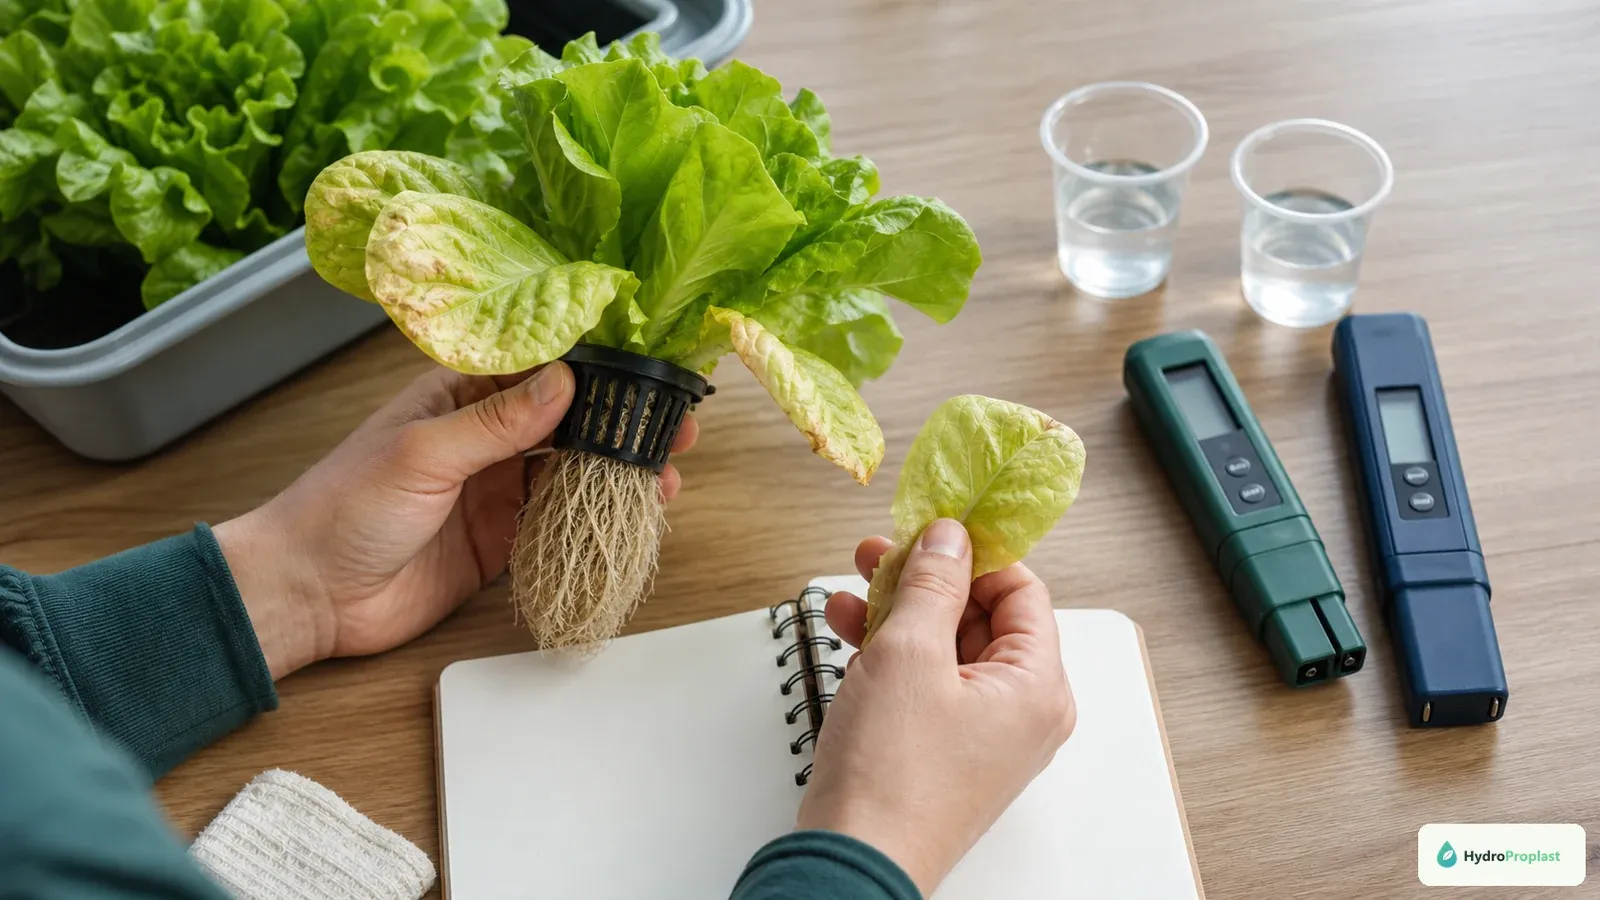
Photograph the plant and label affected positions. Record reservoir temperature, pH, EC, water level, recent top-ups, nutrient recipe, plant age, and any product added. A trend is more useful than one isolated number.
Read where yellowing begins
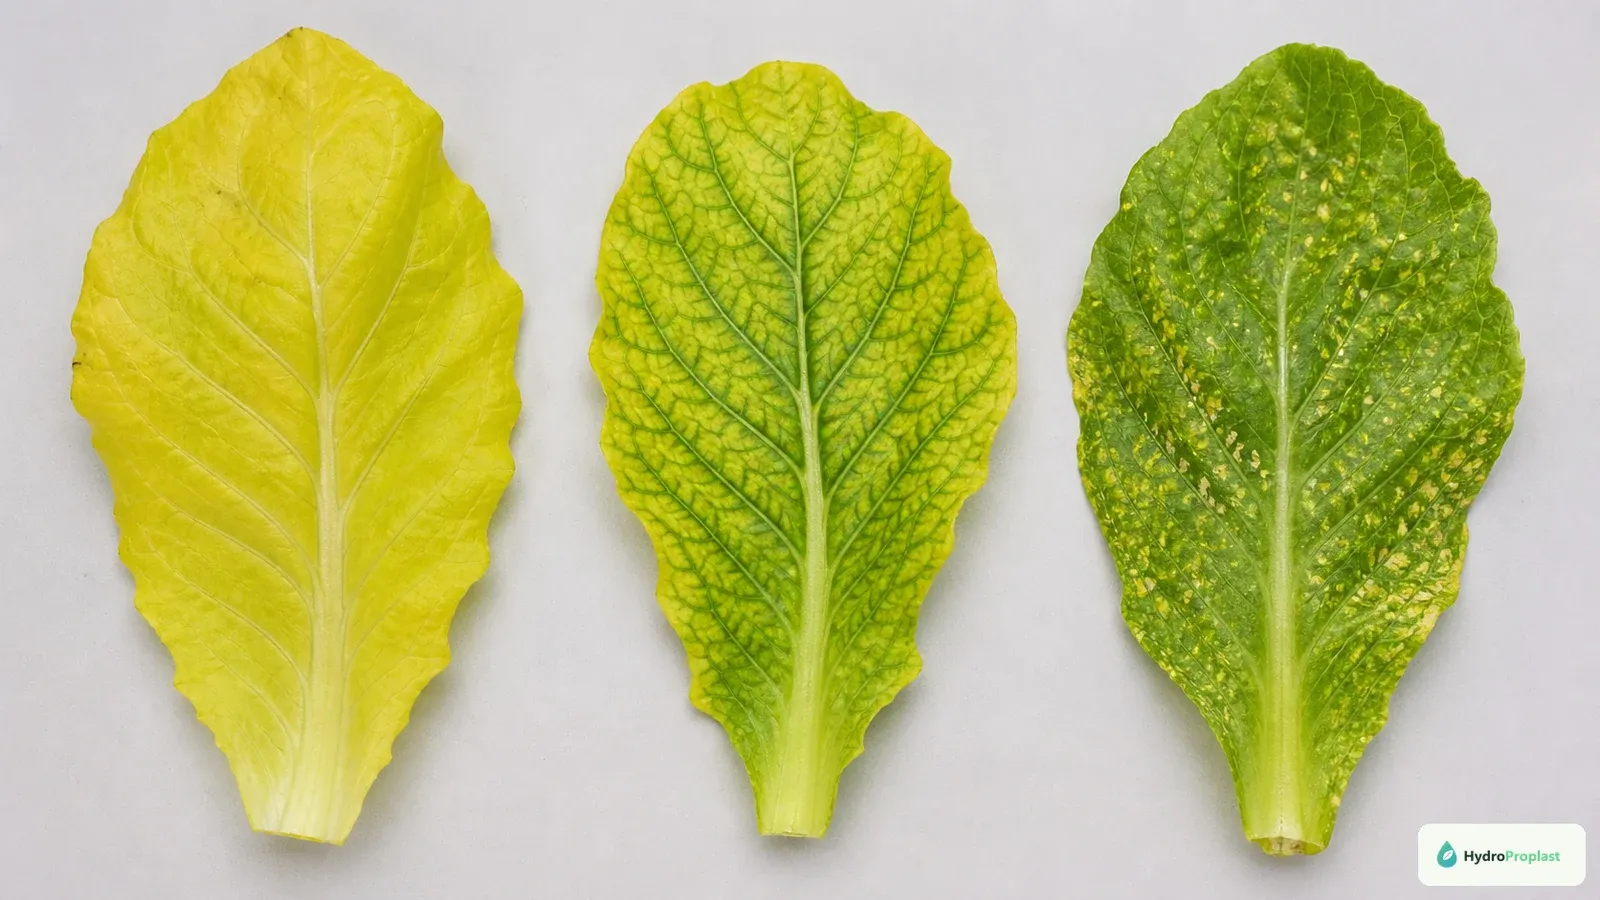
Map the affected leaf age and pattern before changing nutrients.
Older lower leaves yellowing first often points toward normal senescence, prolonged low nitrogen availability, root stress, or inadequate light reaching the lower canopy. New leaves yellowing while veins remain greener can be associated with iron availability or high root-zone pH. Yellowing between veins on older leaves may suggest magnesium-related trouble, but photographs alone cannot confirm it.
Uniform paling across the plant suggests a system-wide limitation such as weak light, an unsuitable nutrient concentration, or impaired roots. One plant among healthy neighbors suggests a blocked emitter, damaged roots, local shading, or a pest. Map the pattern before changing the shared reservoir.
Decide whether it is normal aging
A mature plant may retire one shaded lower leaf while its growing tip, roots, and newer foliage remain healthy. Remove only leaves that are fully declining and record the observation. Rapid progression upward, several affected plants, stalled growth, or yellow new leaves is not ordinary aging.
Compare plants of the same cultivar and age. Different varieties naturally vary in shade and leaf pattern, so do not diagnose from a catalog photograph.
Inspect roots before blaming nutrients
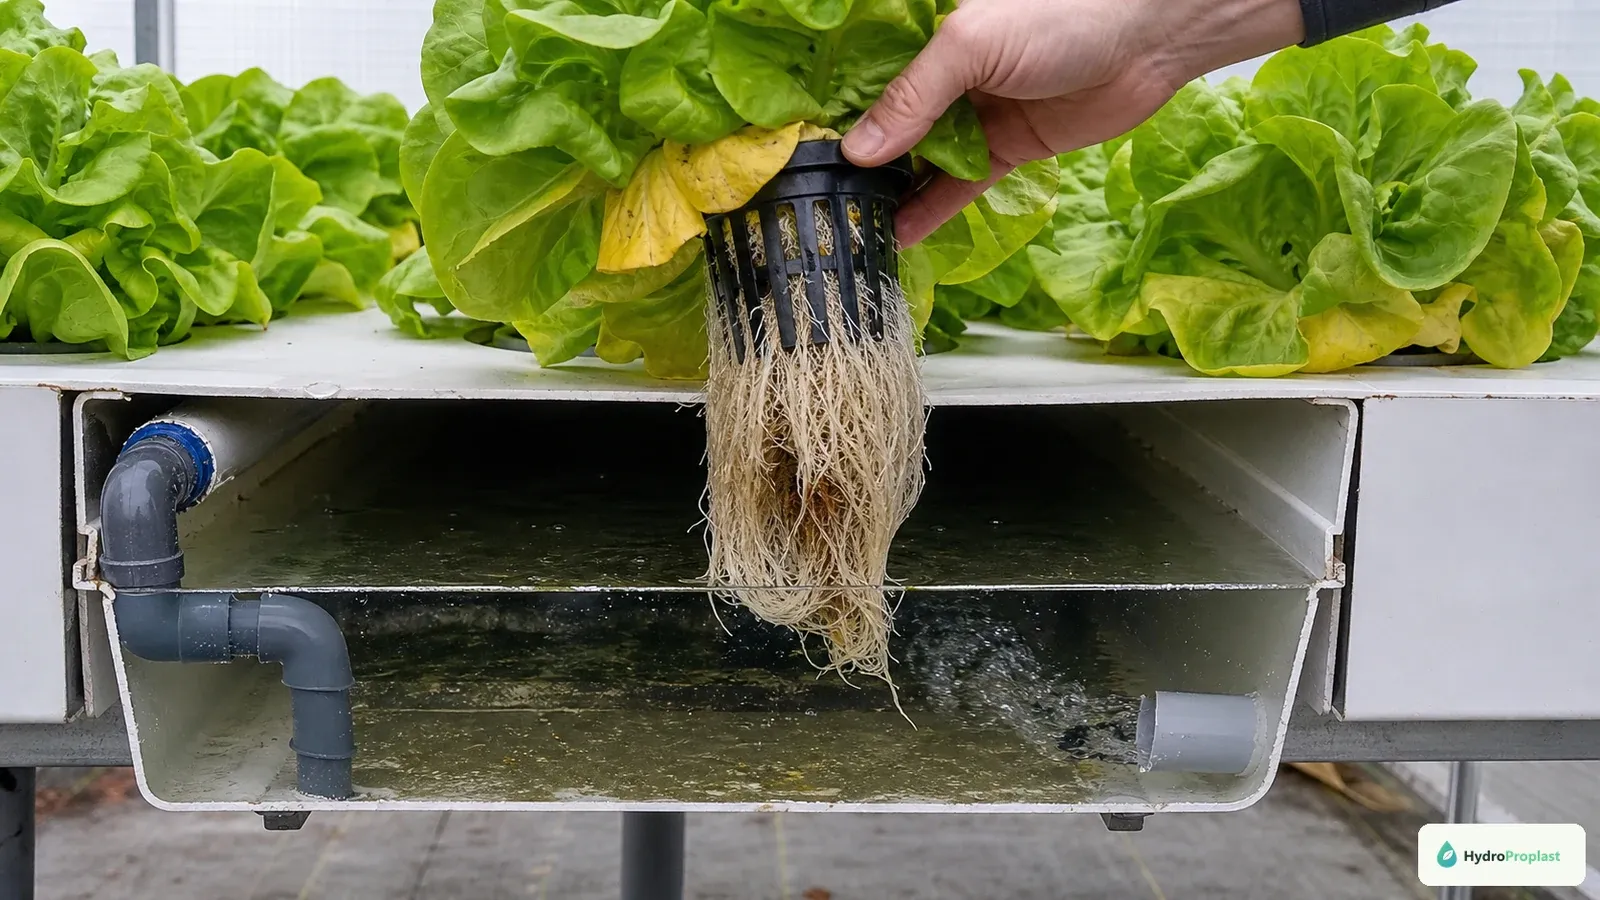
Root-zone trouble can reduce uptake and imitate a nutrient deficiency even when the solution contains enough fertilizer.
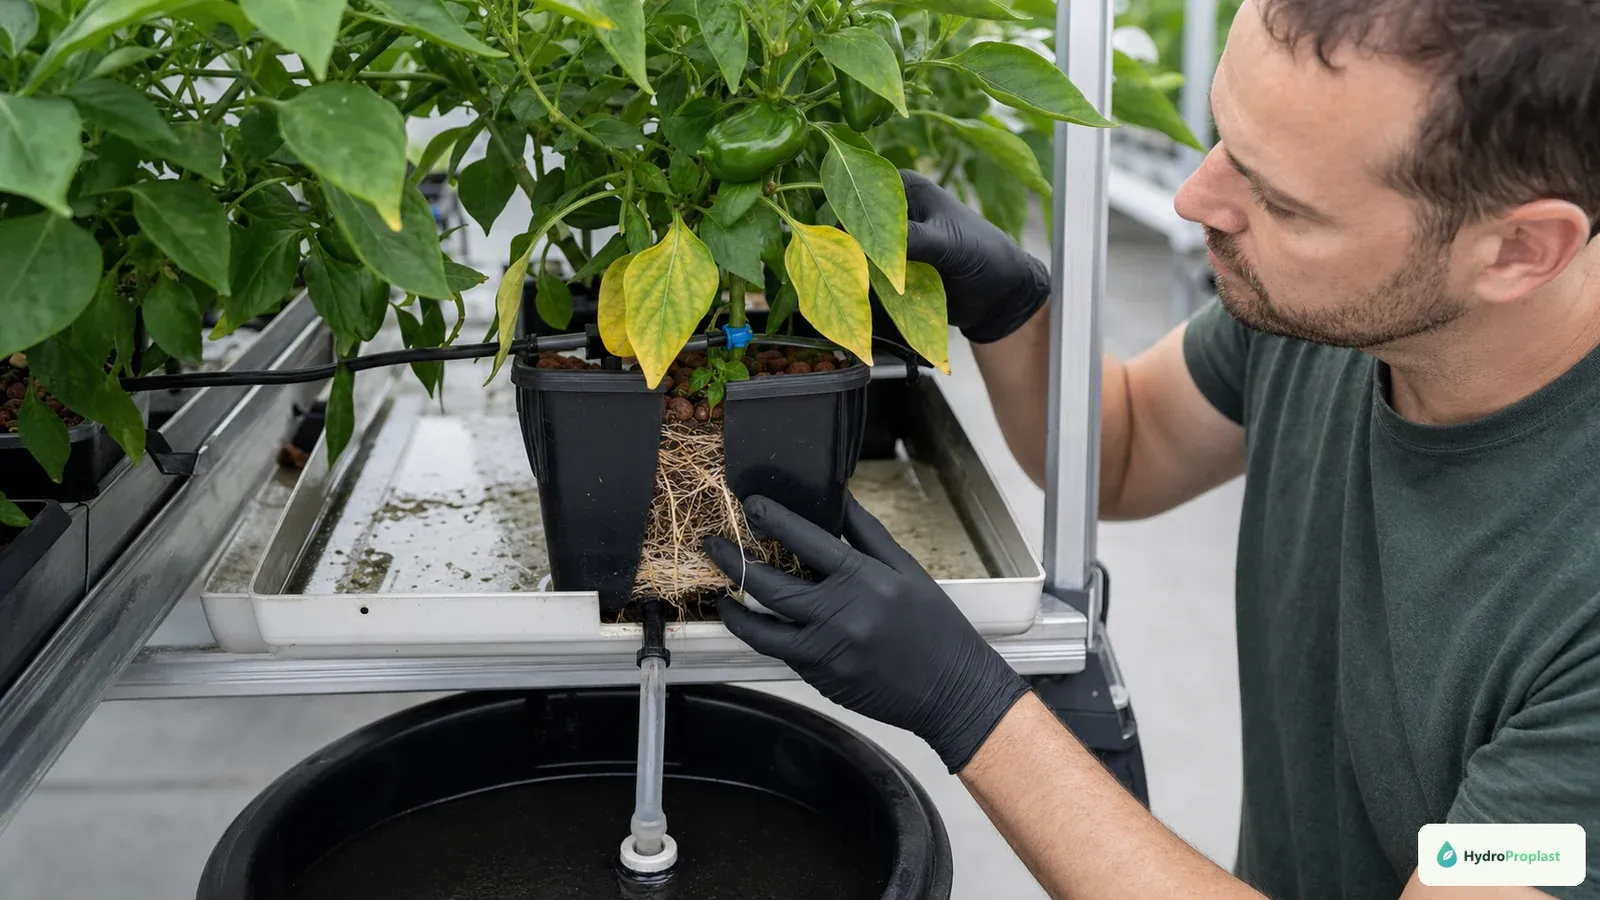
Lift a representative plant safely. Healthy roots are generally firm and fresh-smelling; nutrient products can stain them tan without disease. Slime, tissue that slips apart, sour odor, browning accompanied by wilt, or poor new root growth indicates a root-zone problem.
Check solution temperature, dissolved-oxygen support, pump operation, flow, and accumulated debris. The hydroponic root rot guide explains how to separate staining from decay and protect unaffected plants.
When roots cannot function, adding fertilizer does not cure the leaf. Correct oxygen, temperature, flow, and sanitation first.
Verify pH correctly
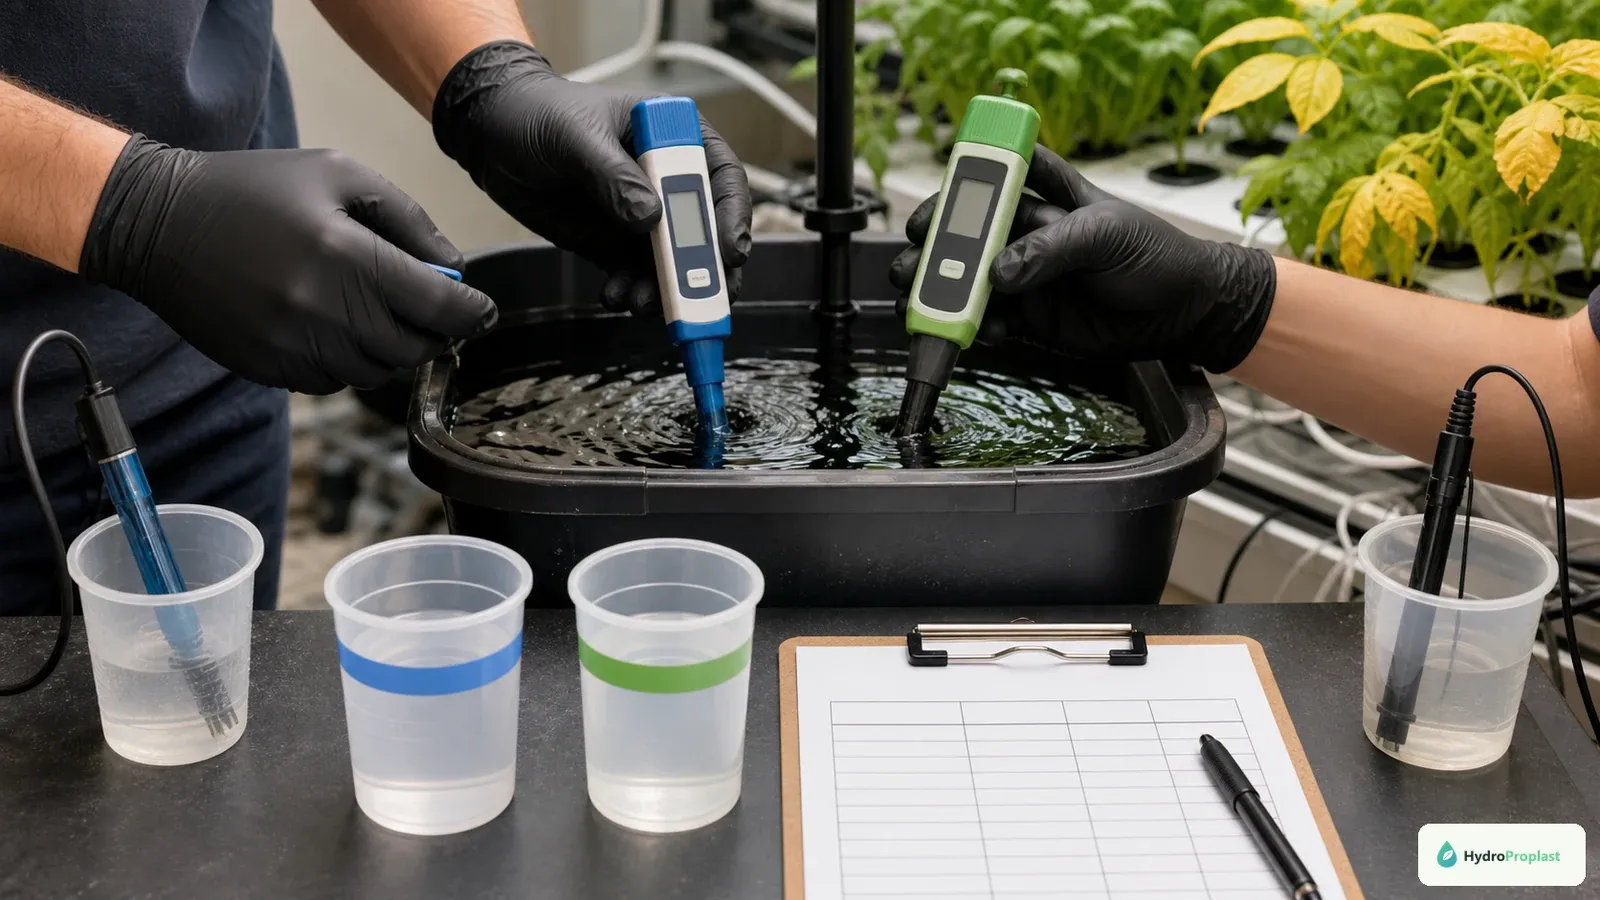
Verify calibrated measurements and the recent mixing record before making a controlled correction.
An unsuitable pH can reduce nutrient availability even when the reservoir contains enough fertilizer. Calibrate the meter with fresh standards, rinse the probe as instructed, and retest a well-mixed sample. Strips can provide a rough cross-check but may be difficult to interpret in colored solution.
Review the hydroponic pH guide before adjusting. Use the crop and nutrient manufacturer’s range, make small diluted corrections, mix thoroughly, wait, and remeasure. Never chase every minor fluctuation.
Oklahoma State University Extension’s EC and pH guide explains that these measurements must be interpreted together.
Interpret EC as a trend
EC estimates total dissolved ions; it does not identify individual nutrients. Compare reservoir EC with the mixed recipe, source water, top-up history, crop stage, and previous days. Rising EC while water falls can indicate that plants are taking proportionally more water than salts. Falling EC can accompany strong nutrient uptake, dilution, or a leak.
A high reading plus scorched tips and stalled roots may support overconcentration. A low reading plus broad paling may support underfeeding, but only after measurement and root problems are excluded. Follow the nutrient label and the crop response rather than copying an unrelated online target.
For meter limitations and calibration, see whether hydroponics needs pH and EC meters.
Check the mixing record
Confirm the product, dilution, order of addition, and final reservoir volume. Concentrates should be diluted into water separately according to the manufacturer; mixing concentrates together can create precipitates. Verify that both parts of a two-part formula were used and that measuring tools have clear units.
Consider source-water EC and alkalinity. A recipe that works with low-mineral water may behave differently with hard water. Do not add isolated calcium, magnesium, iron, or nitrogen merely because a color chart named that element.
Separate deficiency from lockout
A deficiency means the plant is not receiving enough usable nutrient. Lockout is shorthand for reduced uptake or availability despite nutrient being present, often involving pH, root injury, salinity, or chemical interactions. Both can create similar leaves, but their corrections differ.
Correct verified environmental and measurement errors first. If the recipe was demonstrably too weak, replace or adjust solution according to its label. If EC is excessive or the formula was mixed incorrectly, dilute or replace appropriately. Wait for new growth; damaged leaves usually do not become perfect again.
Evaluate light and temperature
Low light reduces photosynthesis and can cause pale, weak growth, especially in crowded lower leaves. Excessive light or heat more often produces bleaching at exposed upper surfaces, curling, or dry patches. Measure the canopy rather than judging brightness by eye.
Check fixture distance, dimmer setting, timer, canopy coverage, room temperature, and recent changes. The LED selection guide explains PPFD maps and daily light delivery.
Root-zone heat can reduce oxygen availability and magnify stress. Compare air and solution temperatures over the full light cycle, not only one afternoon reading.
Inspect pests and leaf surfaces
Use a hand lens on upper and lower leaf surfaces, stems, and growing tips. Look for insects, cast skins, webbing, eggs, stippling, distorted new growth, or sticky residue. Localized speckling is different from uniform chlorosis.
Quarantine affected plants when practical. Identify the pest before choosing any control and use only products labeled for the crop and setting. Do not pour foliar pesticides into a reservoir or improvise household mixtures.
Use a controlled correction sequence
First restore hardware, water level, aeration, flow, and safe temperature. Second verify calibrated pH and EC. Third inspect roots and the mixing record. Fourth correct only the most strongly supported cause. Keep other variables stable for several days and watch new growth.
If the reservoir composition is unknown, contaminated, or grossly mis-mixed, a complete change with correctly prepared solution may be clearer than repeated additions. The water-change guide covers safe turnover decisions.
Do not remove every yellow leaf at once. Retain partly functional foliage unless it is diseased, decaying, or blocking necessary airflow.
Pattern-based checklist
When lower leaves yellow first, check age, shading, nitrogen delivery, EC trend, and roots. When new leaves are pale, verify pH, roots, and formula completeness. When margins burn, assess EC, heat, airflow, and water uptake. When one system position fails, inspect its emitter, flow, light, and root access. When the entire system changes after a top-up, audit what was added.
Record the response after correction. Improving new leaves, resumed root growth, and stable water use are stronger evidence than the color of already damaged tissue.
When to discard a plant
Remove a plant when its crown is collapsing, roots are extensively decomposed, a serious transmissible pest or disease is confirmed, or recovery would threaten healthy neighbors. Isolate tools and avoid moving questionable roots through the shared reservoir.
For valuable or repeated failures, contact a local extension service or plant diagnostic laboratory. Provide clear photographs, crop and cultivar, root images, pH and EC records, water source, nutrient label, temperatures, and a timeline.
Prevention routine
Measure and log pH, EC, reservoir level, and temperature on a consistent schedule. Inspect roots and emitters weekly, keep light out of the reservoir, clean equipment between crops, calibrate meters, and mix nutrients by measured final volume. Maintain spacing so every plant receives light and airflow.
Penn State Extension’s overview of plant nutrient deficiency and toxicity emphasizes that symptoms overlap and diagnosis requires context. That principle is especially important in recirculating hydroponics.
The fastest safe response to yellow leaves is not a bottle. It is a sequence: map the symptom, verify the root zone, confirm measurements and records, correct one supported cause, and judge recovery from new growth.
A 48-hour diagnostic worksheet:
At the first observation, mark affected leaves with a small tag or photograph their position. Measure the solution only after it is mixed and circulating. Write down actual numbers rather than “normal.” Check the meter calibration date, nutrient batch, reservoir volume, plant count, and time since the last complete change. Inspect one healthy-looking plant as a control before deciding that all roots share the same condition.
During the next light period, confirm that the timer and fixture operate for the intended duration. Compare canopy positions: yellowing concentrated at edges can reveal uneven light or flow, while a problem clustered beside an air stone, return line, heater, or warm pump may reveal a local environment. Verify emitter output with measured collection where the system permits; a dripping emitter can look active yet deliver much less than its neighbors.
After making one correction, avoid judging it by an old yellow leaf. Mark the newest expanding leaf and photograph it daily under similar lighting. Note whether new tissue is greener, internodes resume normal growth, roots produce fresh tips, and water use stabilizes. Some nutrient-related improvements require multiple days, and severely damaged tissue may never recover. Repeated adjustments during that interval can obscure the response.
Common misleading clues:
White or tan roots are not a universal health test because nutrient dyes and organic additives change color. Dark veins are not proof of one element. Brown leaf tips can follow high EC, irregular water uptake, low humidity, excessive airflow, root damage, or prior stress. A pH value inside a general range does not prove accuracy if the probe is dry, contaminated, or overdue for calibration.
Likewise, reservoir EC can remain stable while the nutrient balance changes as plants remove ions selectively. It is a management indicator, not a laboratory analysis. When the history is long, uncertain, or repeatedly corrected, replacing the solution with a carefully measured fresh batch can restore a known baseline. Clean measuring tools and record every addition.
Crop context changes interpretation. Fast-growing lettuce may show a system error quickly, while a large fruiting plant can redistribute mobile nutrients from old leaves during heavy demand. Newly transplanted seedlings may yellow after root disturbance even when the shared solution is suitable for established plants. Separate these stages when possible instead of forcing one concentration and irrigation pattern onto all of them.
Source water deserves its own baseline. Measure its EC and pH consistently, and obtain a water analysis if recurring problems resist normal correction. High alkalinity, sodium, or specific mineral content cannot be diagnosed reliably from leaf color alone. Extension laboratories can help interpret a sample alongside the chosen fertilizer.
Escalate when the same symptom returns across multiple crops despite verified meters, correct mixing, clean equipment, suitable light, and healthy temperatures. Save samples of the nutrient label and water report, and document when symptoms began relative to transplant, top-up, heat event, or product change. A concise history makes professional diagnosis far more useful.
The operating rule is simple: measurements narrow possibilities, spatial patterns reveal local failures, records reveal changes, and new growth confirms recovery. Use all four before concluding that a yellow leaf proves a specific deficiency.